How to add a profile image in JumpLMS
Your JumpLMS profile image helps personalise your account and makes it easier for administrators and Learners to recognise you across the platform.
This guide explains how to upload a profile image to your JumpLMS account using the Resource Library.
How to add a profile image
-
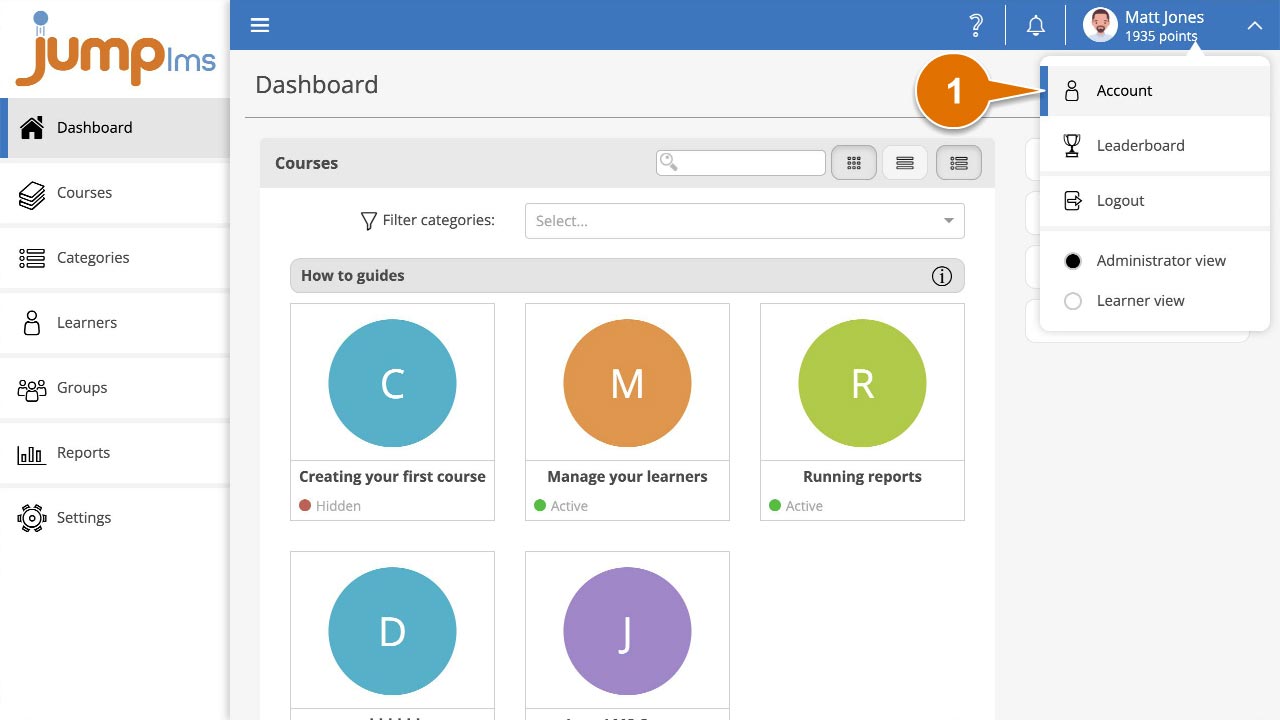
Click on your user profile image or name at the top-right of the screen and select Account.
-
In the Contact Details panel, on the Profile Image row, click Select image to open your Resource Library.

-
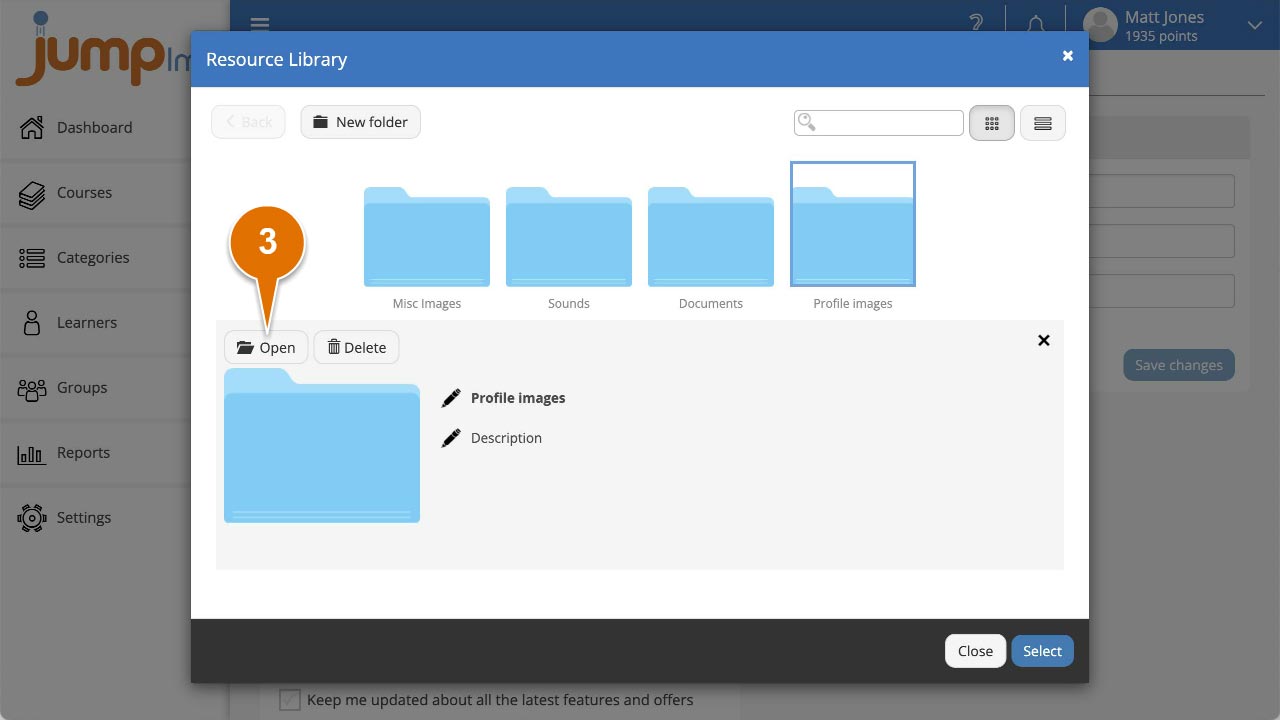
Open the folder where you want to import your profile image by double-clicking the folder icon, or single-clicking it and selecting Open. Alternatively, create a new folder by clicking New folder.
-
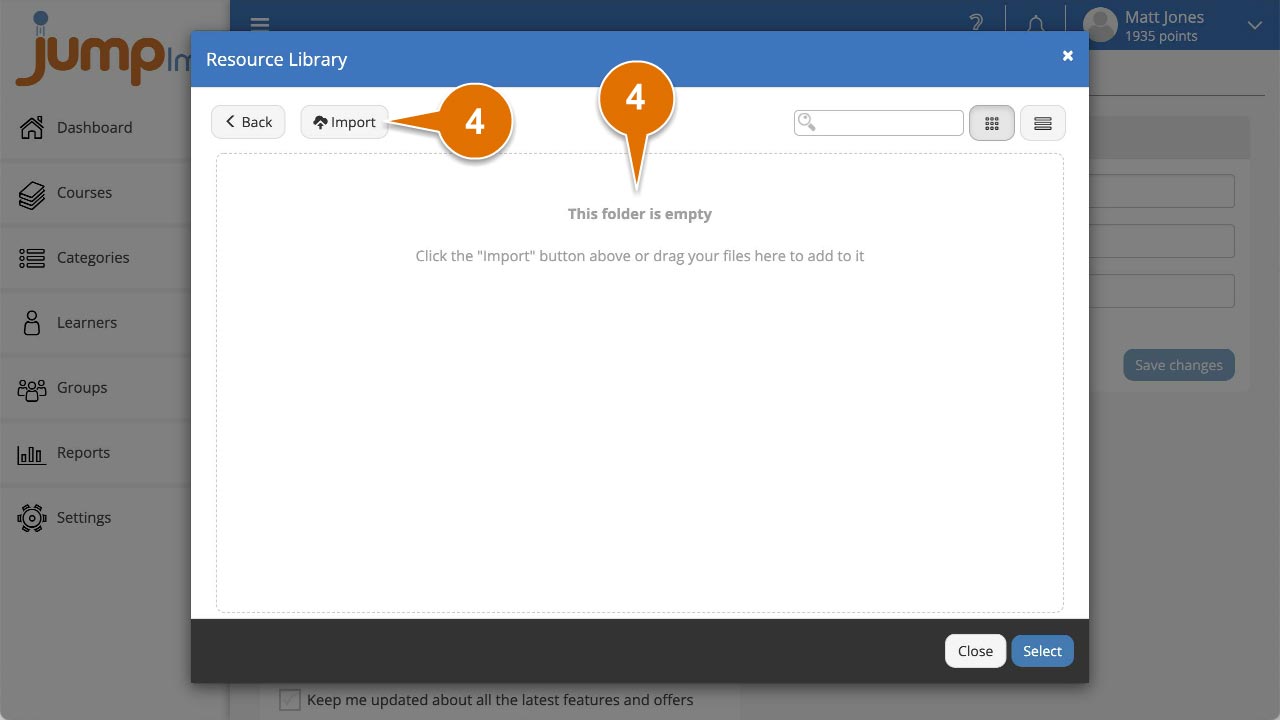
Click Import, browse to your profile image and click Open. You can also drag and drop the image from your computer into the Resource Library.
-
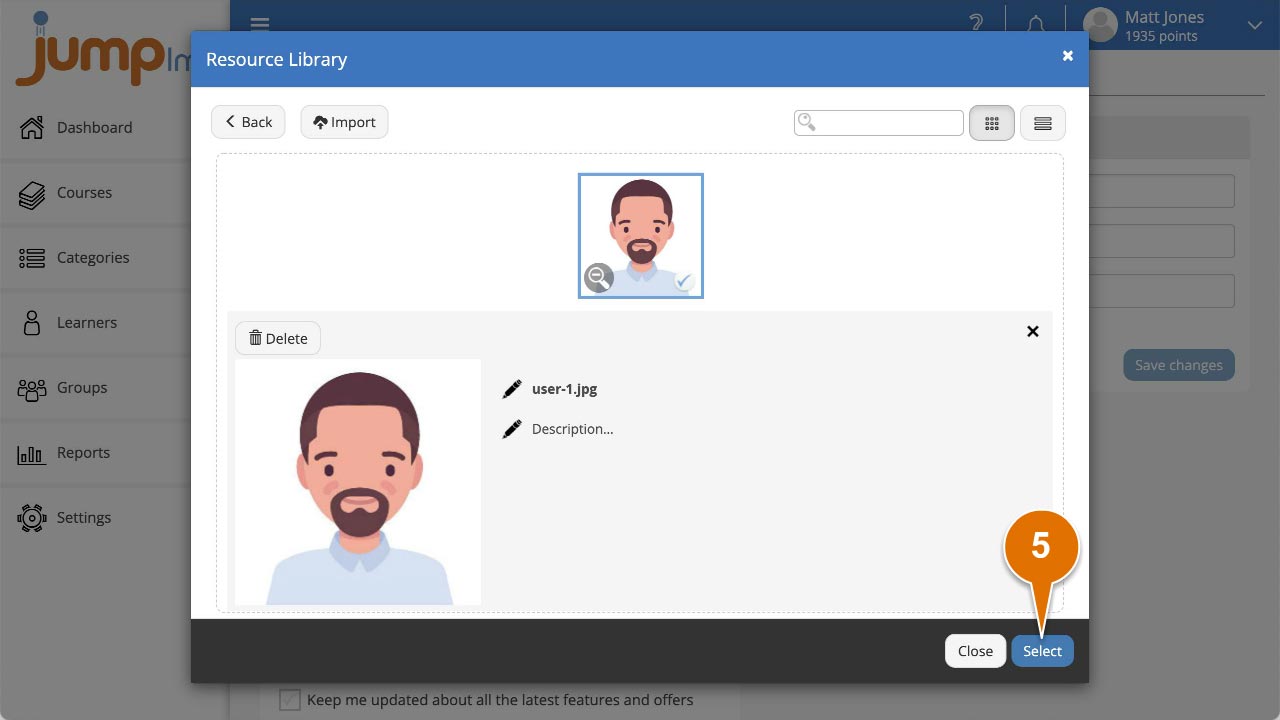
Once the image has uploaded to your Resource Library, select it and click Select.
-
The Resource Library will close. Click Save changes in the Contact Details panel.
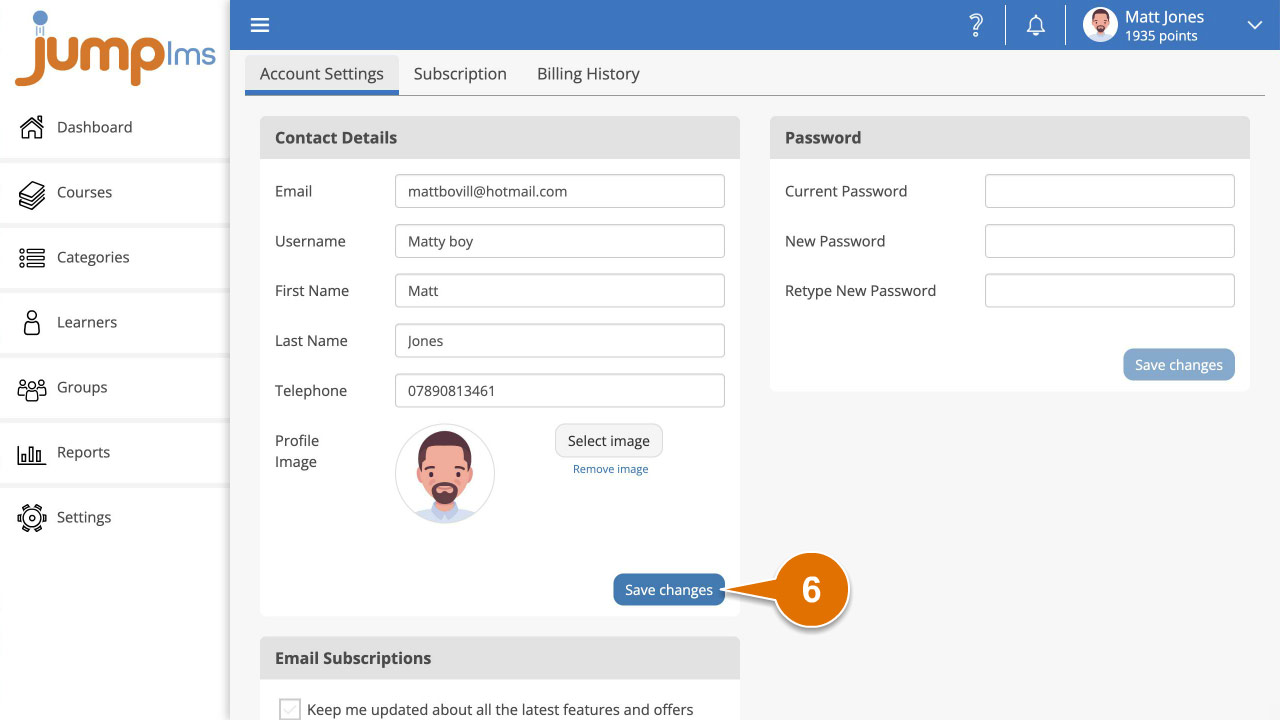
Your profile image has now been added to your JumpLMS account.
Contact the JumpLMS team and we’ll help you find the right answer.