How to display your company logo in the JumpLMS portal
Displaying your company logo is a simple way to customise your JumpLMS portal and create a more branded experience for your Learners.
You can upload two logo versions: one for light backgrounds and one for dark backgrounds. JumpLMS will use the most suitable logo based on your portal colour scheme.
How to display your company logo in the portal
-
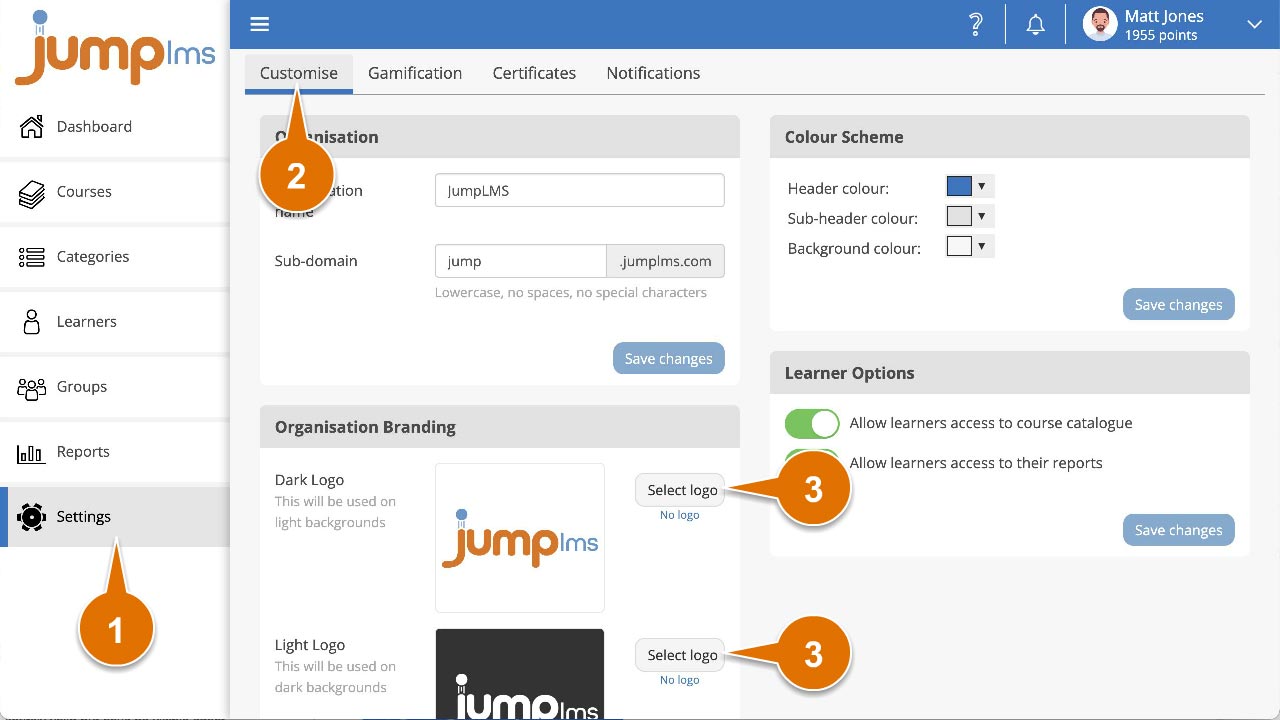
Click on the Settings tab.
-
Click the Customise tab.
-
In the Organisation Branding panel, click Select logo in either the Dark logo or Light logo section to open your Resource Library.
-
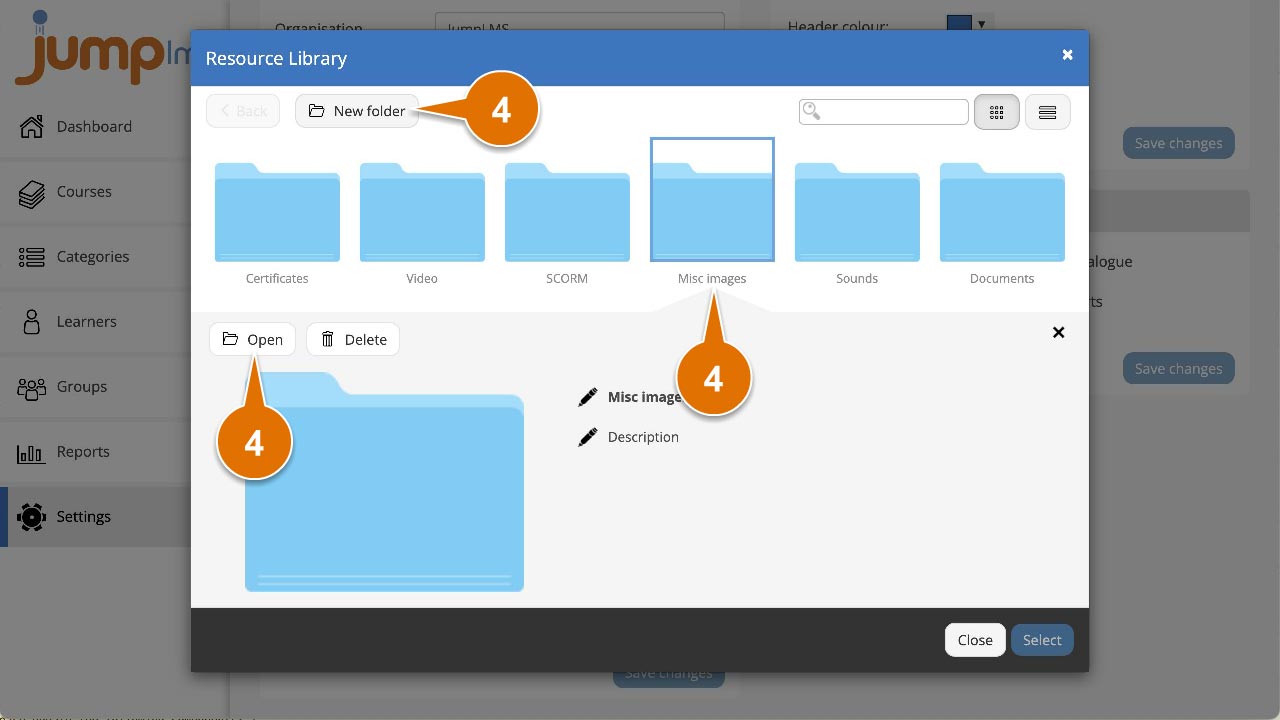
Open the folder where you want to upload your logo. You can also create a new folder by clicking New folder.
-
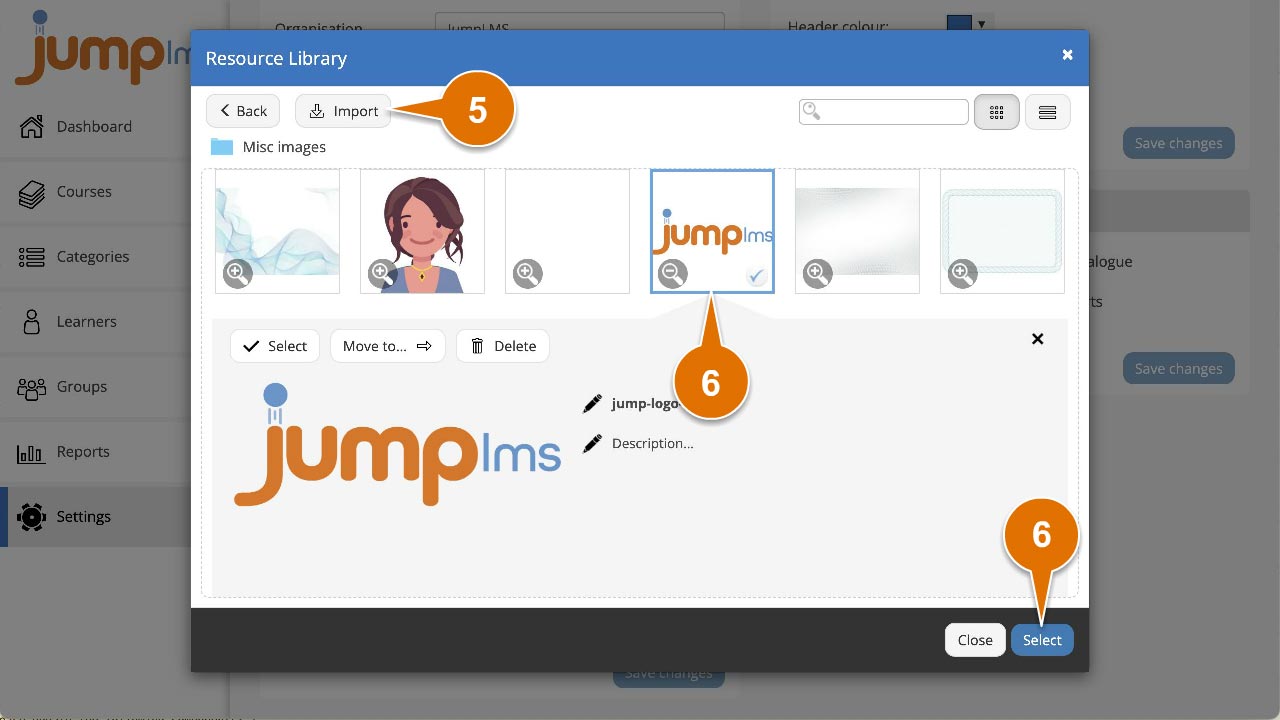
Click Import, browse to your logo file and click Open. Alternatively, drag and drop the image from your computer into the Resource Library.
-
After the logo has uploaded, click the image to highlight it, then click Select.
-
When the Resource Library closes, click Save changes in the Organisation Branding panel.
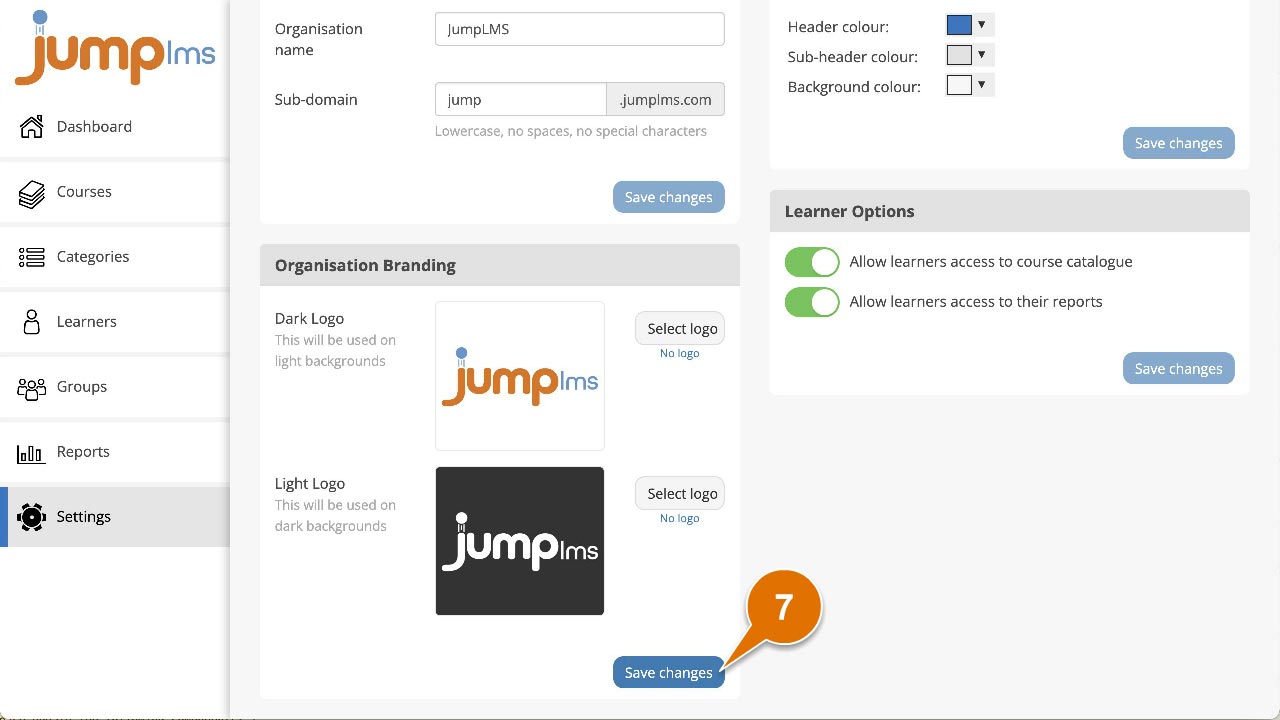
Your company logo will now be displayed in your portal.
Contact the JumpLMS team and we’ll help you find the right answer.