How to edit an automatic notification in JumpLMS
You can manage automatic notifications at any time, helping you stay in control of your portal communications.
From the Notifications area, you can edit notification content, switch notifications on or off, and delete notifications you no longer need.
How to edit an automatic notification
-
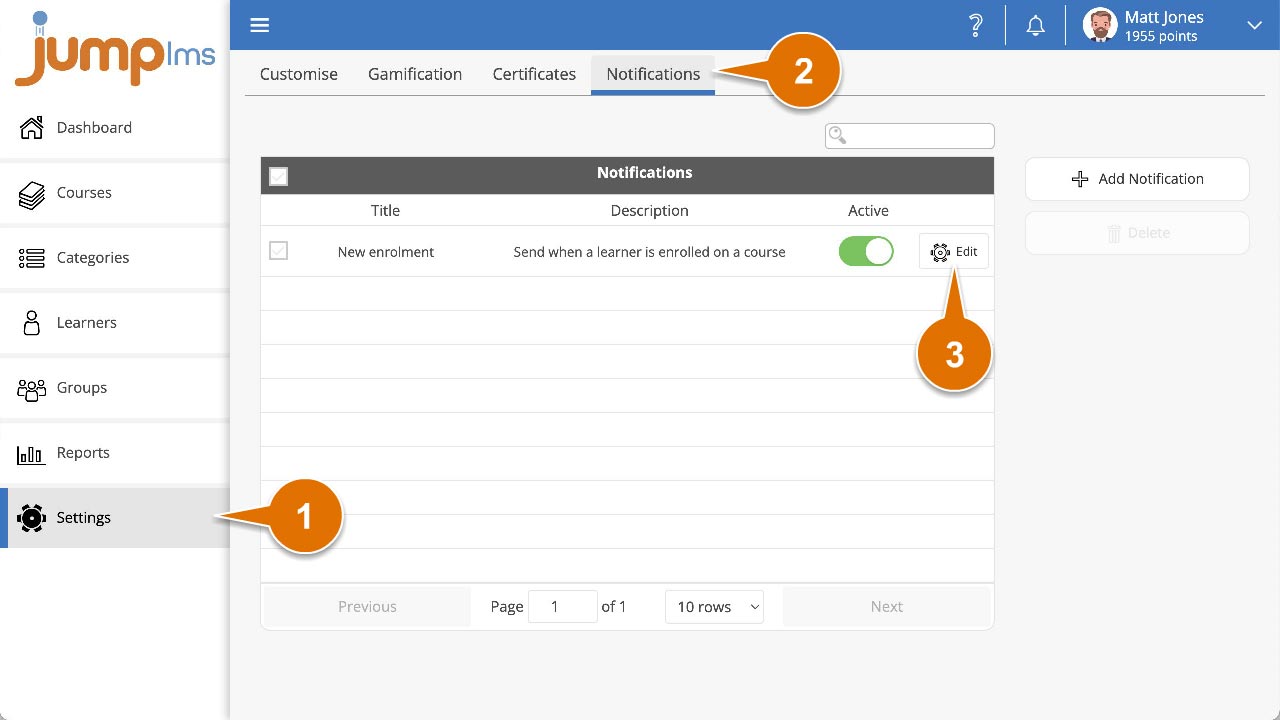
Click on the Settings tab.
-
Click on the Notifications tab.
-
Search for the required notification, or find it in the table and click Edit.
-
Make the required changes.
-
Click Save changes.
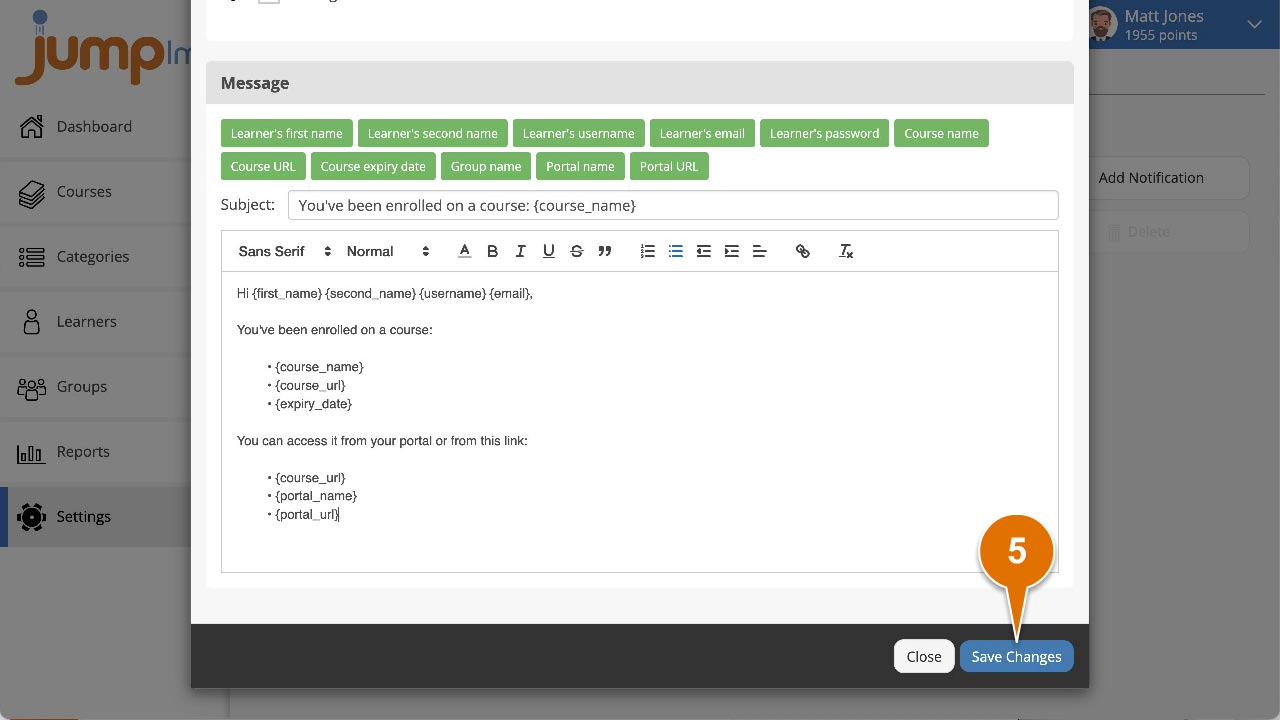
The changes will now take effect.
How to activate or deactivate an automatic notification
-
Click on the Settings tab.
-
Click on the Notifications tab.
-
Search for the required notification, or find it in the table.
-
Switch Active on or off.
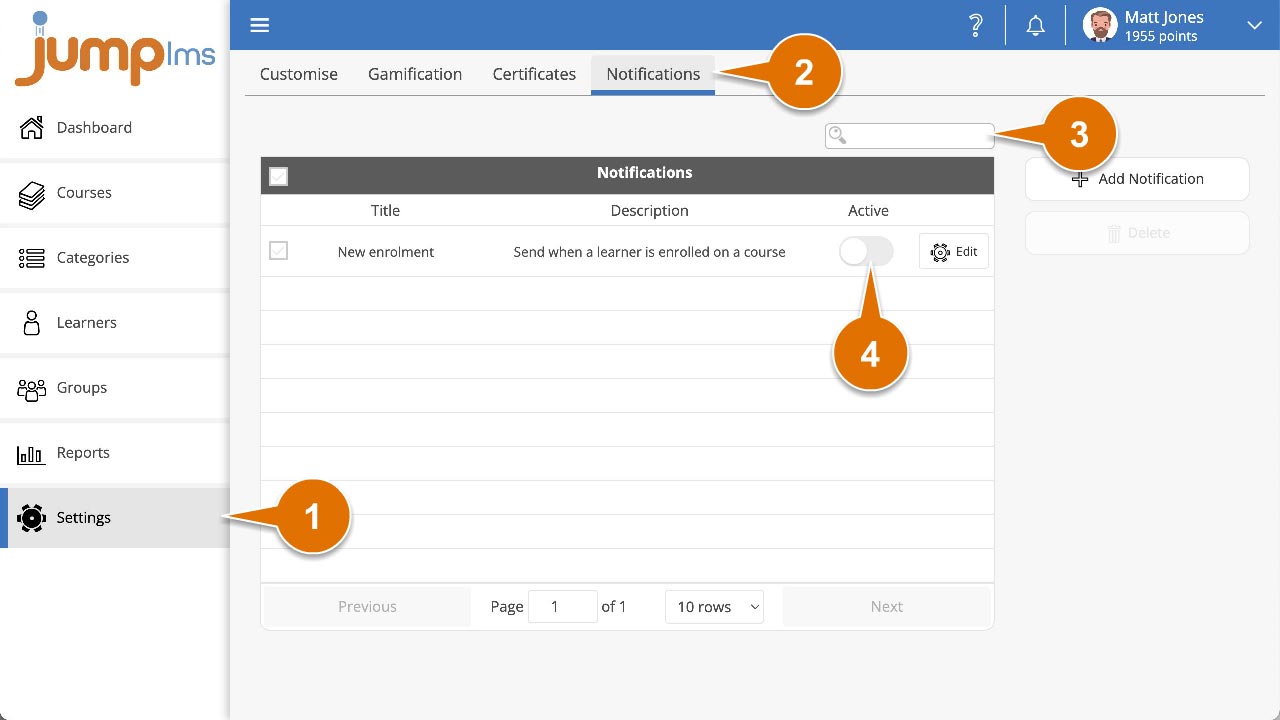
The notification will now be active or inactive.
How to delete an automatic notification
-
Click on the Settings tab.
-
Click on the Notifications tab.
-
Search for the required notification, or find it in the table.
-
Tick each notification you want to delete.
-
Click Delete.
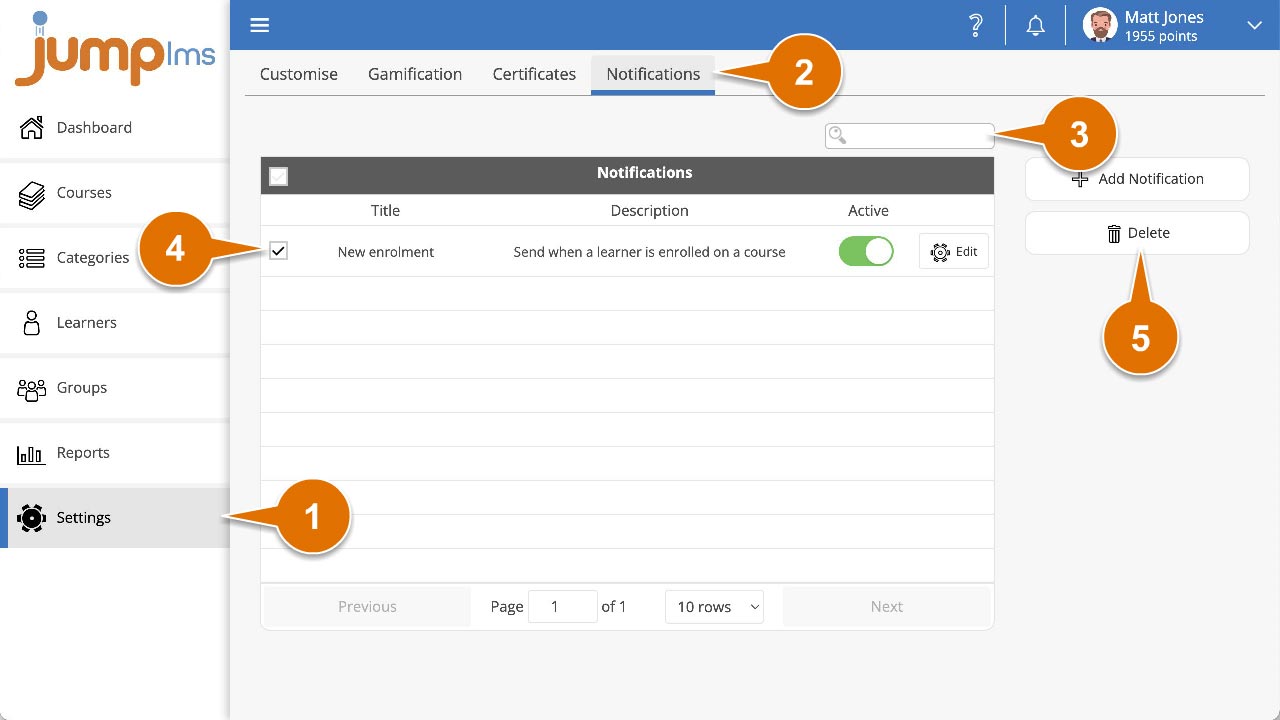
The selected notifications have now been deleted.
Contact the JumpLMS team and we’ll help you find the right answer.