How to add an automatic notification in JumpLMS
Automatic notifications help you keep Learners, managers and administrators informed when important portal events happen.
You can choose the event that triggers the notification, decide who receives it and customise the message with dynamic Learner, course, group and portal information.
How to add a new automatic notification
-
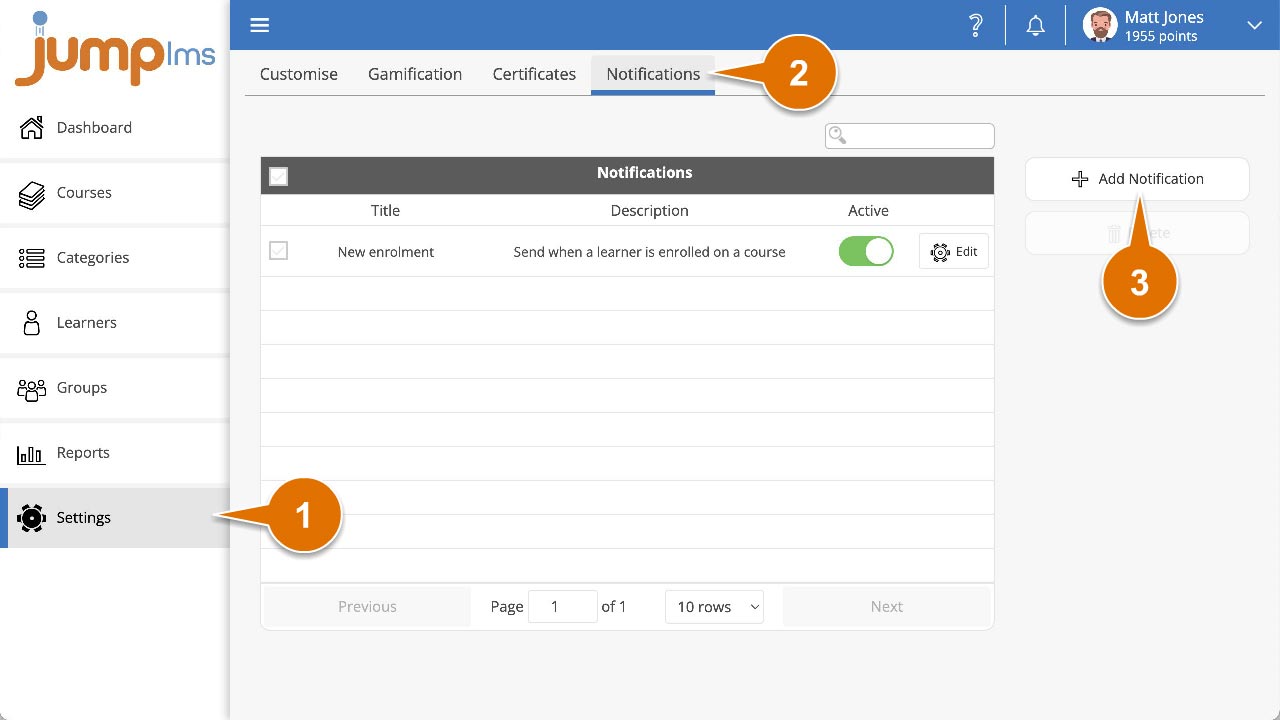
Click on the Settings tab.
-
Click on the Notifications tab.
-
Click Add notification.
-
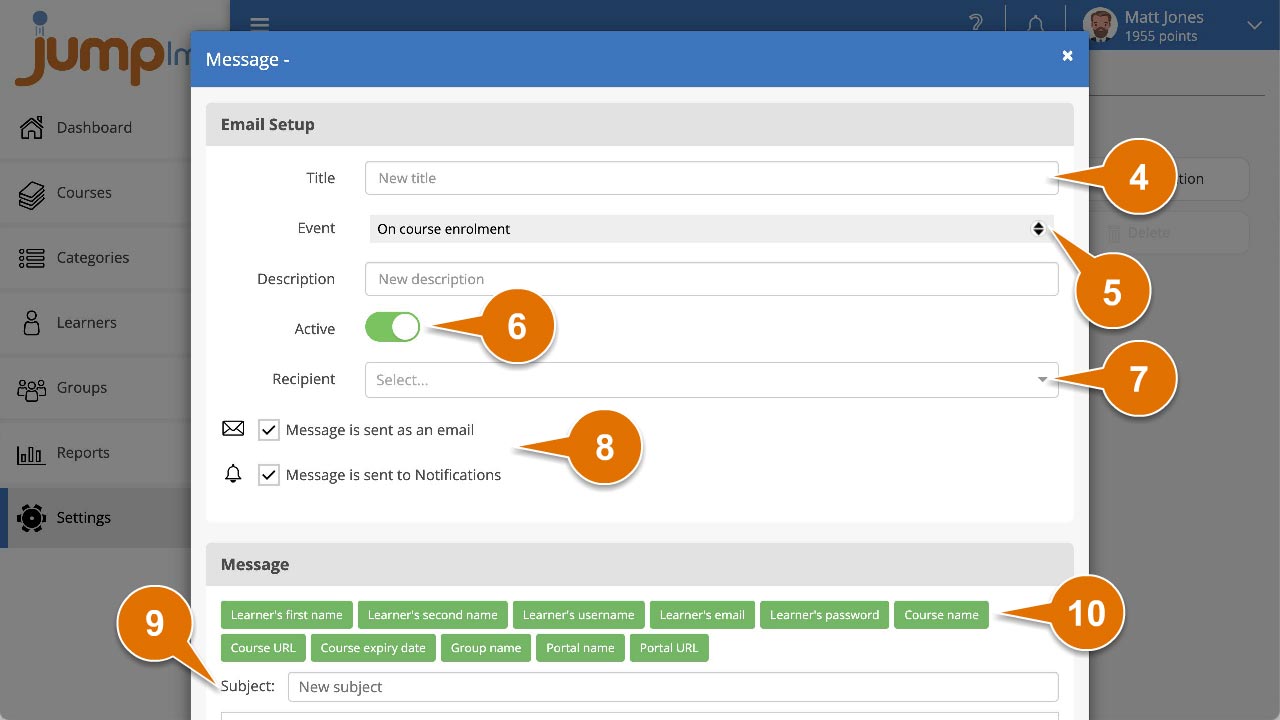
Enter a title and description for the notification.
-
Open the Event dropdown list and select the event that will trigger the notification. You can choose from:
- On Learner added
- On course enrolment
- On self enrolment
- On request enrolment
- On course completion
- On course expiry
- On group assignment
-
Switch Active on or off.
-
Open the Recipient dropdown list and select who will receive the notification when it is triggered.
-
Select how you want to send the message. You can choose:
- Message is sent as an email
- Message is sent to Notifications
-
Add a Subject.
-
Compose the message that will be sent. Use the variable data buttons to add dynamic content into the message:
- Learner's first name
- Learner's second name
- Learner's username
- Learner's email
- Learner's password
- Course name
- Course URL
- Course expiry date
- Group name
- Portal name
- Portal URL
-
Click Add message.
The notification will now be sent automatically to the selected recipients when the chosen event occurs.
Contact the JumpLMS team and we’ll help you find the right answer.