How to create a video element in JumpLMS
Video elements let you add video-based learning to your JumpLMS courses. You can upload your own video file or embed a video from YouTube.
This guide explains both methods: adding a video from your Resource Library and embedding a video from YouTube.
How to create a video element
-
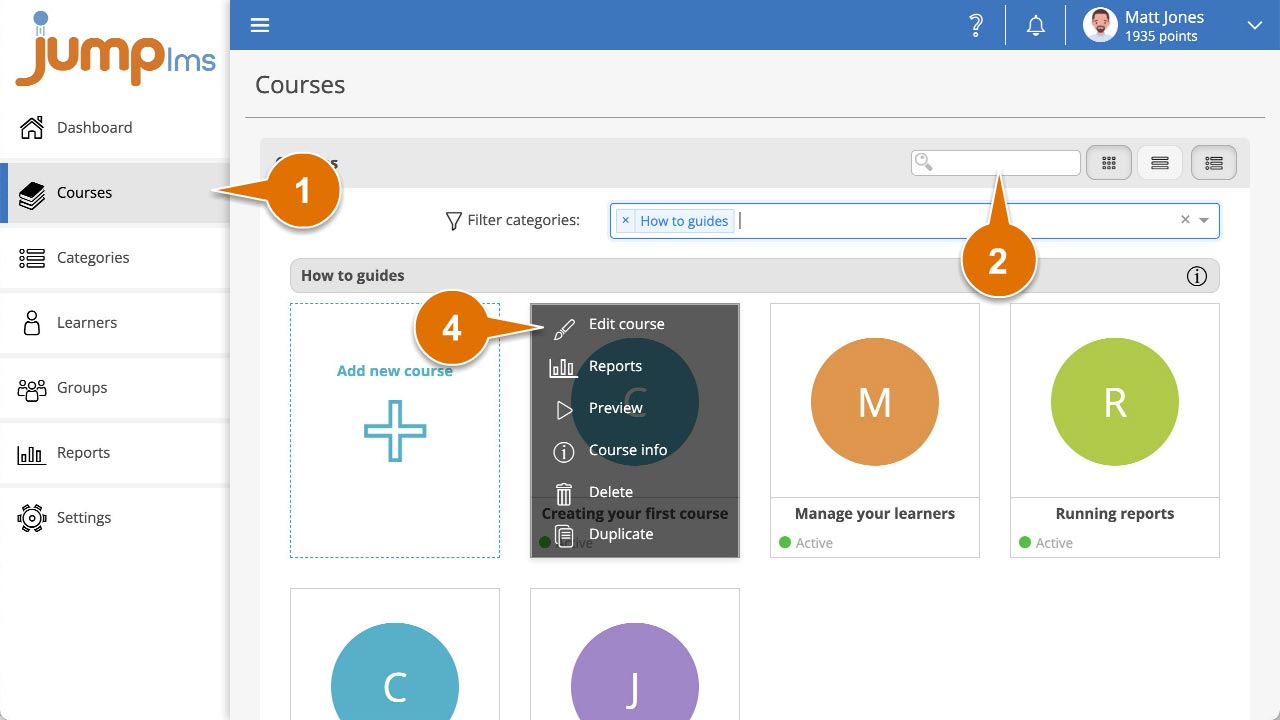
Click on the Courses tab.
-
Search for the course you want to add the video element to, or find it in the course list.
-
Open the course options and click Edit course.
-
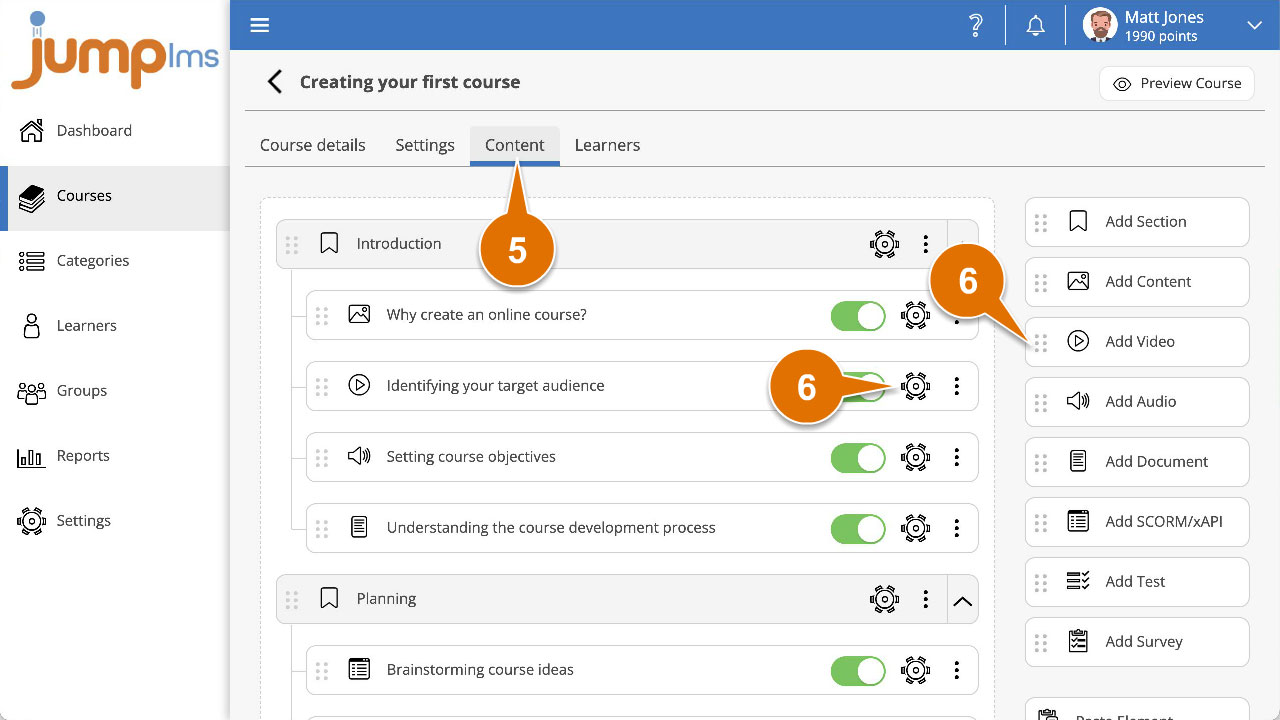
Click on the Content tab.
-
Click Add Video to add the element to the end of the course structure, or drag and drop it into the position you want. Then click Edit.
-
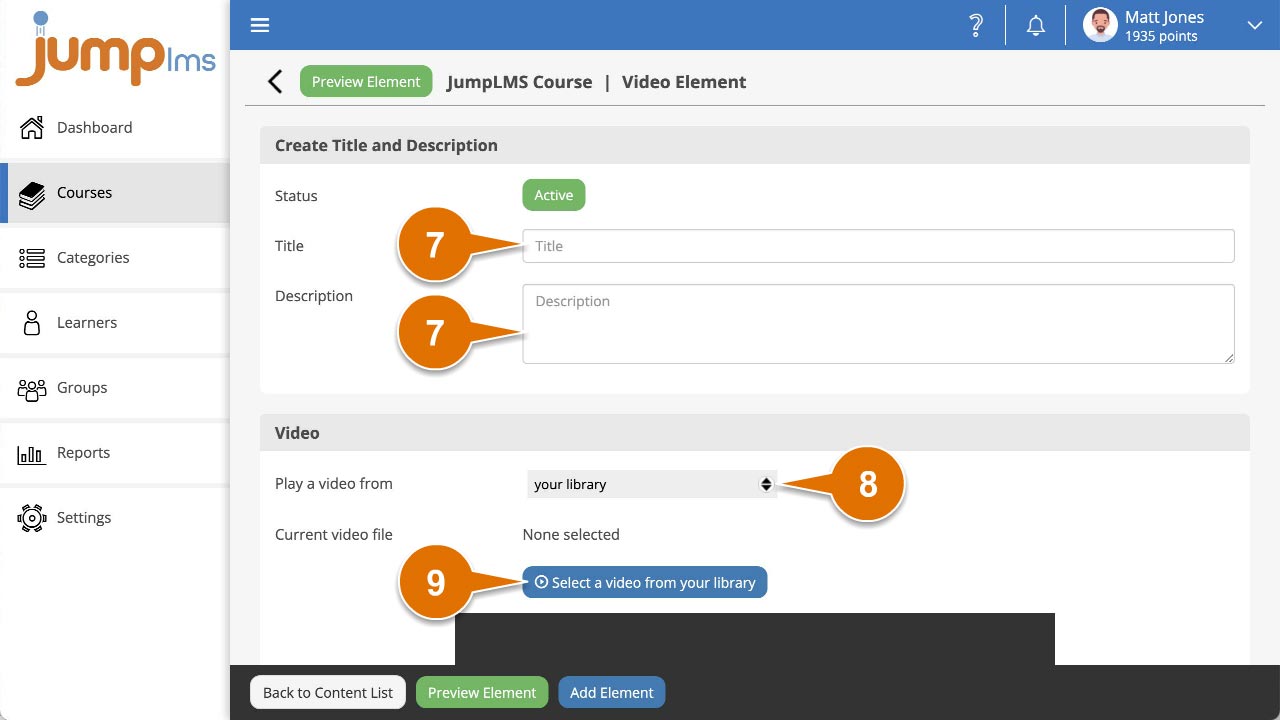
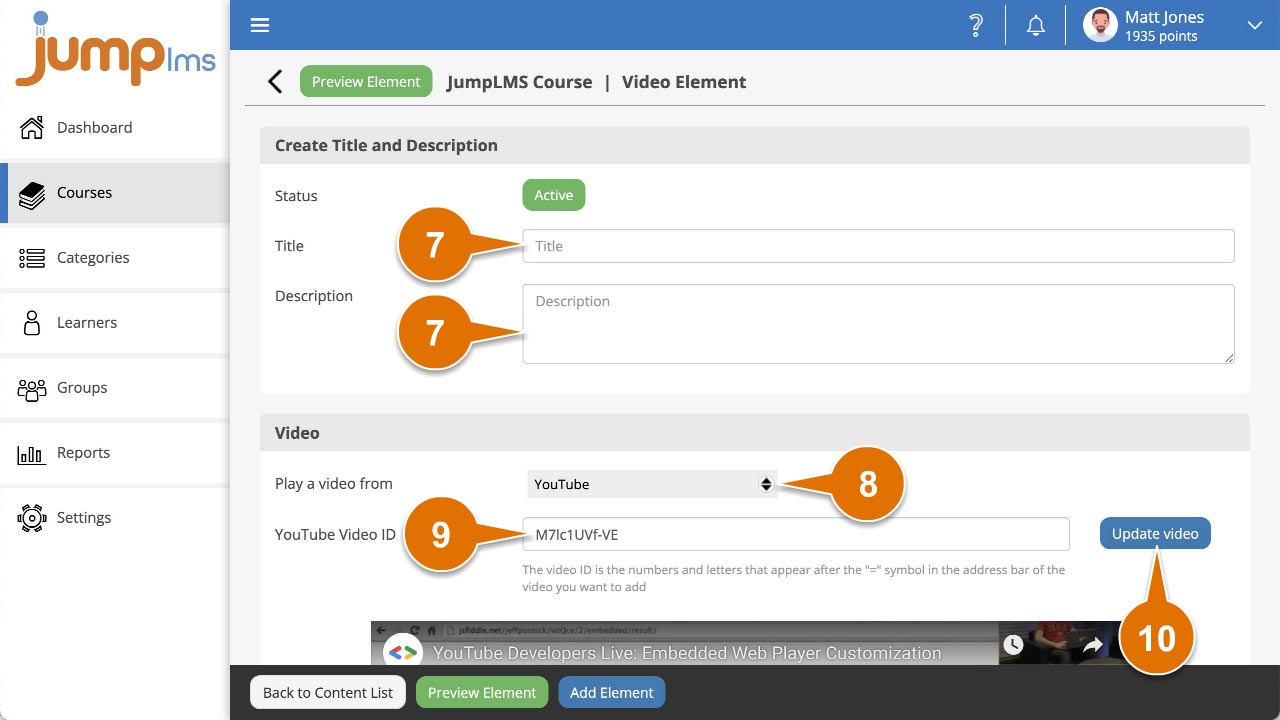
Enter a title and description for the element.
Option 1: Use a video from your Resource Library
-
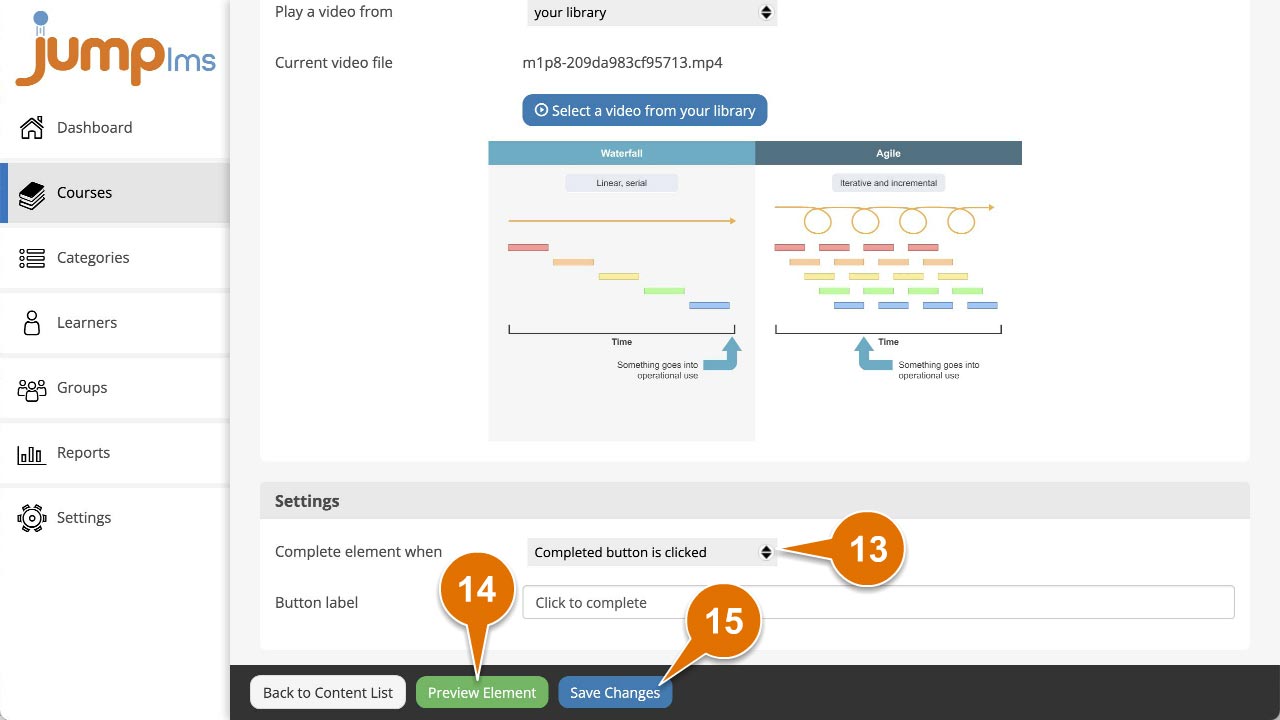
Select Play a video from your library.
-
Click Select a video from your library to open your Resource Library.
-
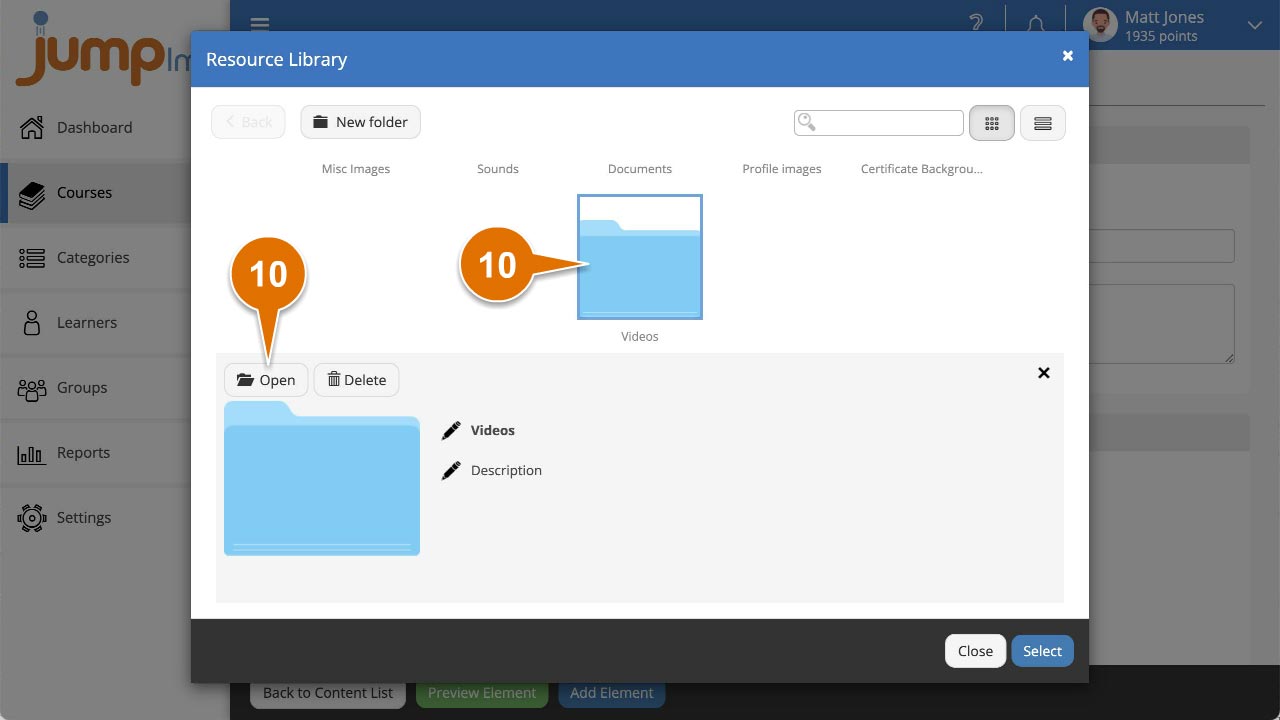
Open the folder where you want to import the video.
-
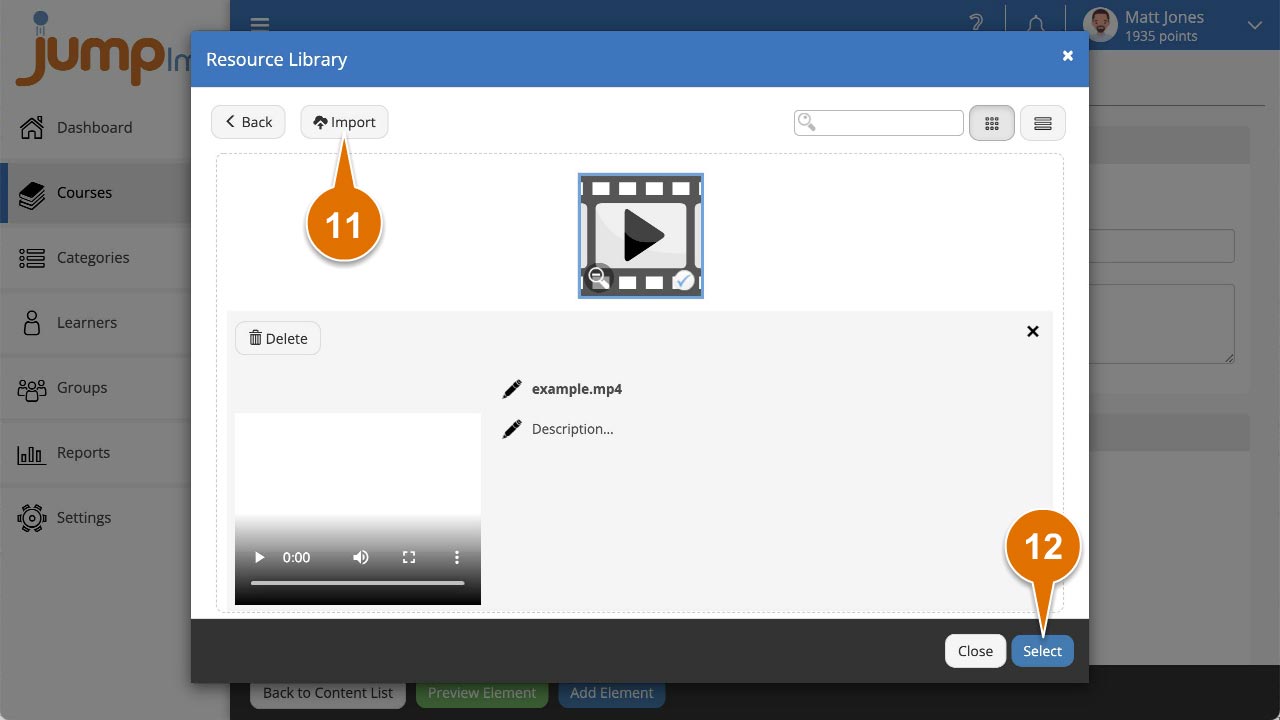
Click Import and browse to the location of your video, or drag and drop the video directly into the upload area.
-
When the video has finished importing, select it and click Select.
-
Set the completion criteria in the Settings panel by choosing an option from the Complete element when dropdown.
-
Click Preview Element if you want to see how the video element will look in the course.
-
Click Add Element.
Option 2: Use a video from YouTube
-
Select Play a video from YouTube.
-
Enter the YouTube Video ID. This is usually the string of characters after v= in the YouTube video URL.
-
Click Update video.
-
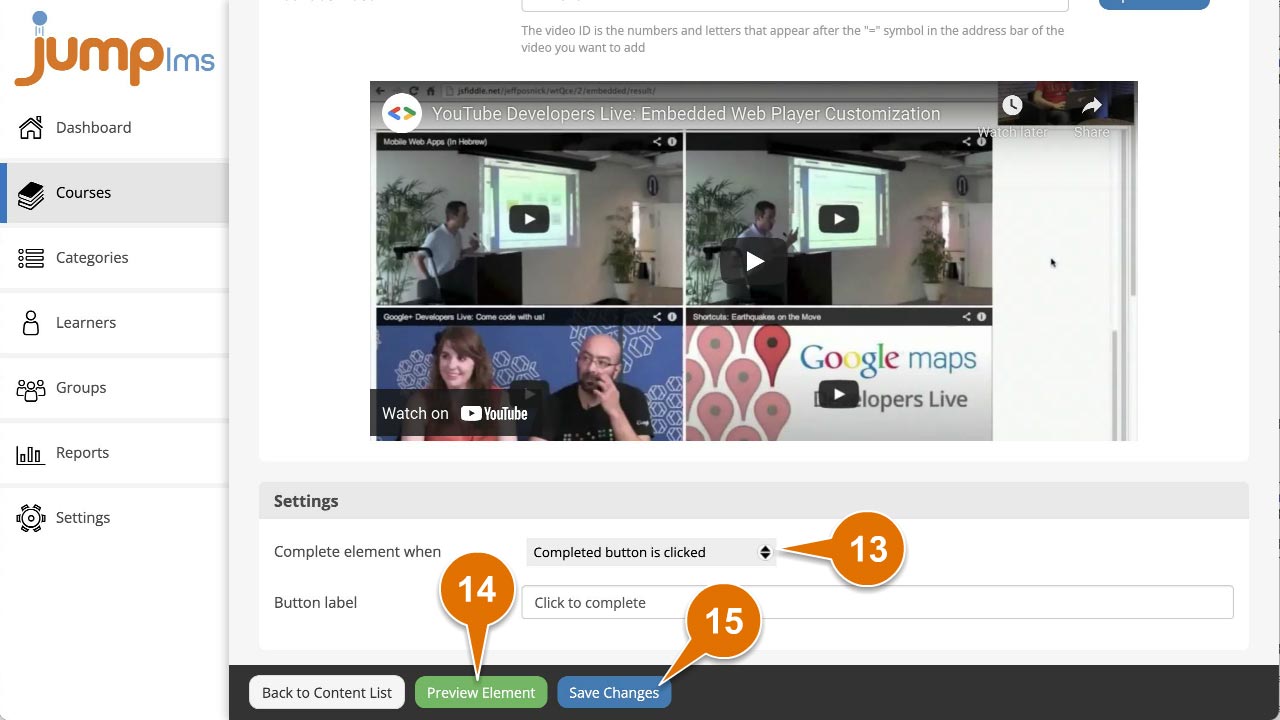
Set the completion criteria in the Settings panel by choosing an option from the Complete element when dropdown.
-
Click Preview Element if you want to see how the video element will look in the course.
-
Click Add Element.
The video element has now been added to your course.
Contact the JumpLMS team and we’ll help you find the right answer.