How to create a HTML content element in JumpLMS
HTML content elements let you add flexible page-style content to a course, including text, images, links, formatted instructions, and other web-based content.
You can write the content yourself using the text editor, or use JumpAI to generate a first draft based on the course title, page title, and page description.
How to create a HTML content element
-
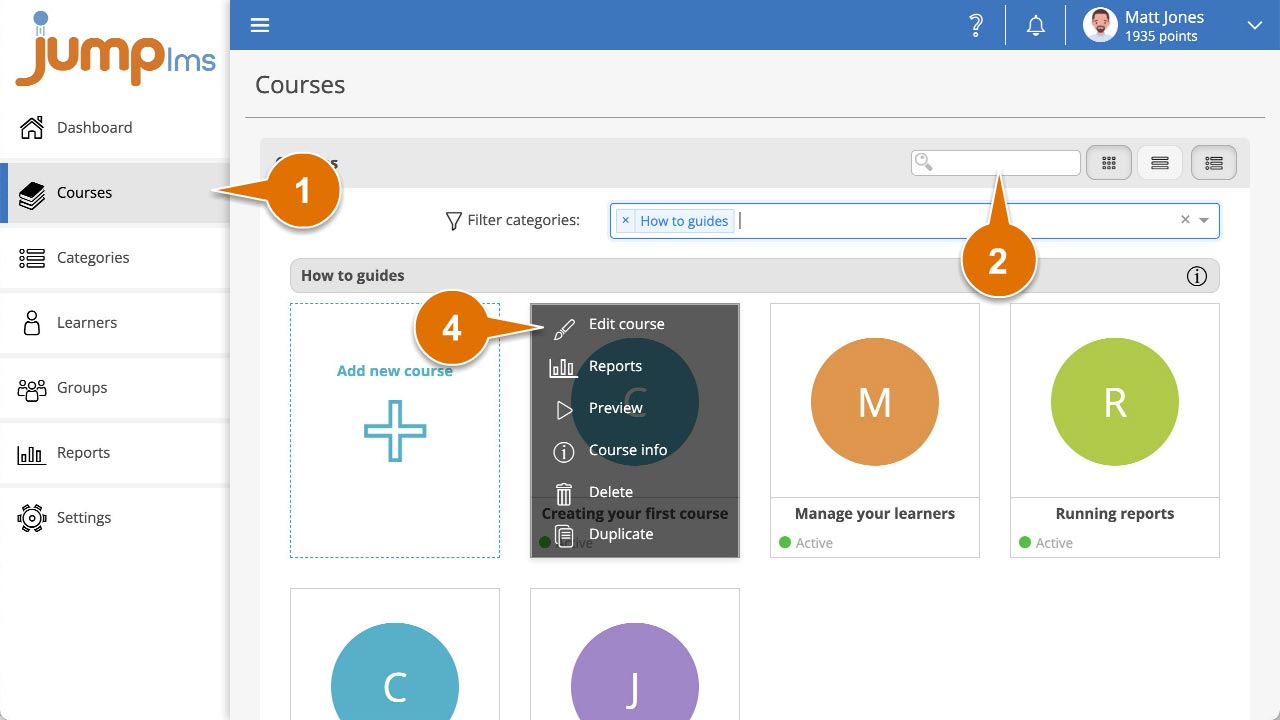
Click on the Courses tab.
-
Search for the course you want to add the content element to, or find it in the course list.
-
Open the course options and click Edit course.
-
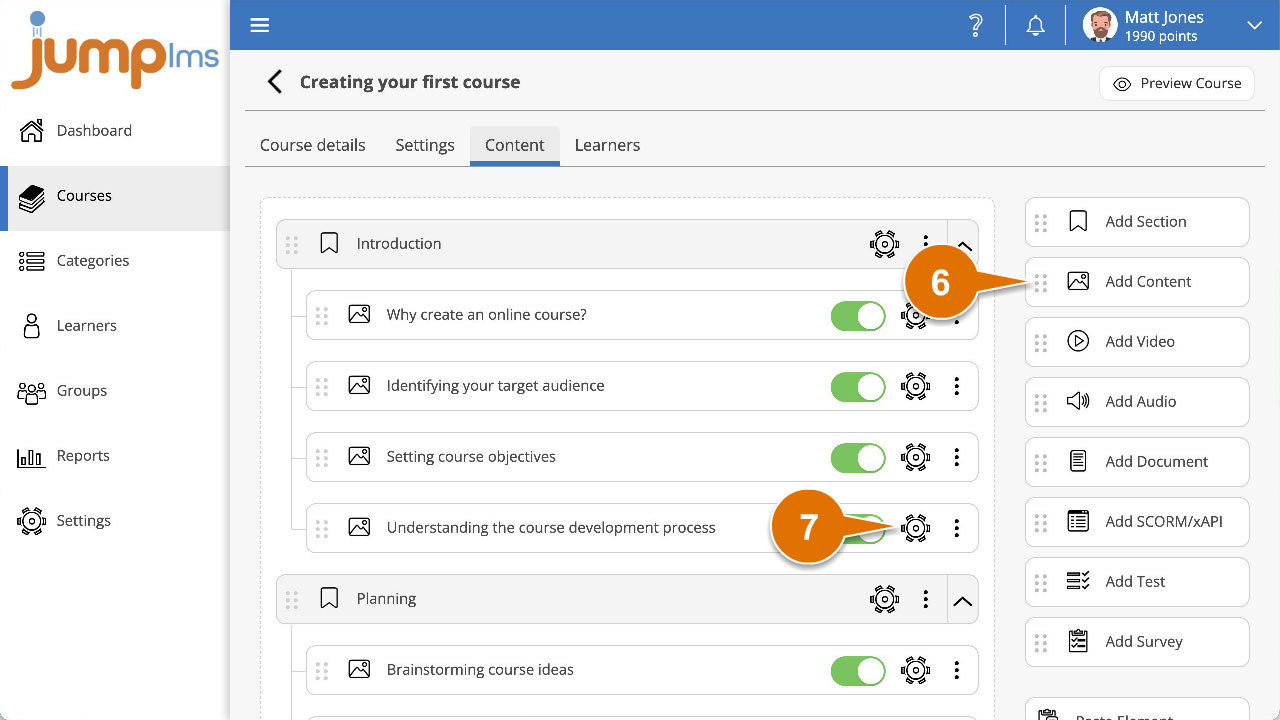
Click on the Content tab.
-
Click Add Content to add the element to the end of the course structure, or drag and drop it into the position you want.
-
Click the Edit button.
-
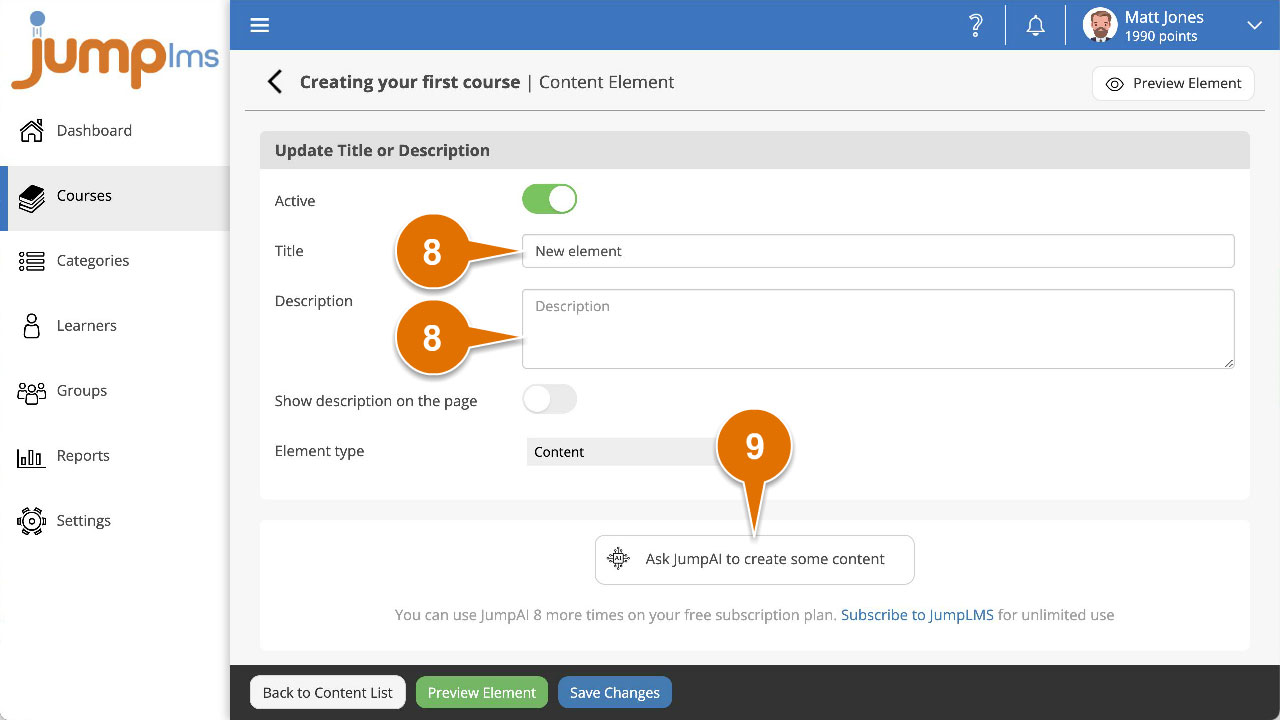
Enter a title and description for the element.
-
Use the text editor to add your HTML content, or ask JumpAI to create content for you. JumpAI will use the course title, page title, and page description to create the content and add an appropriate image.
-
Set the completion criteria in the Settings panel by choosing an option from the Complete element when dropdown.
-
Click Preview Element if you want to see how the element will look in the course.
-
Click Add Element.
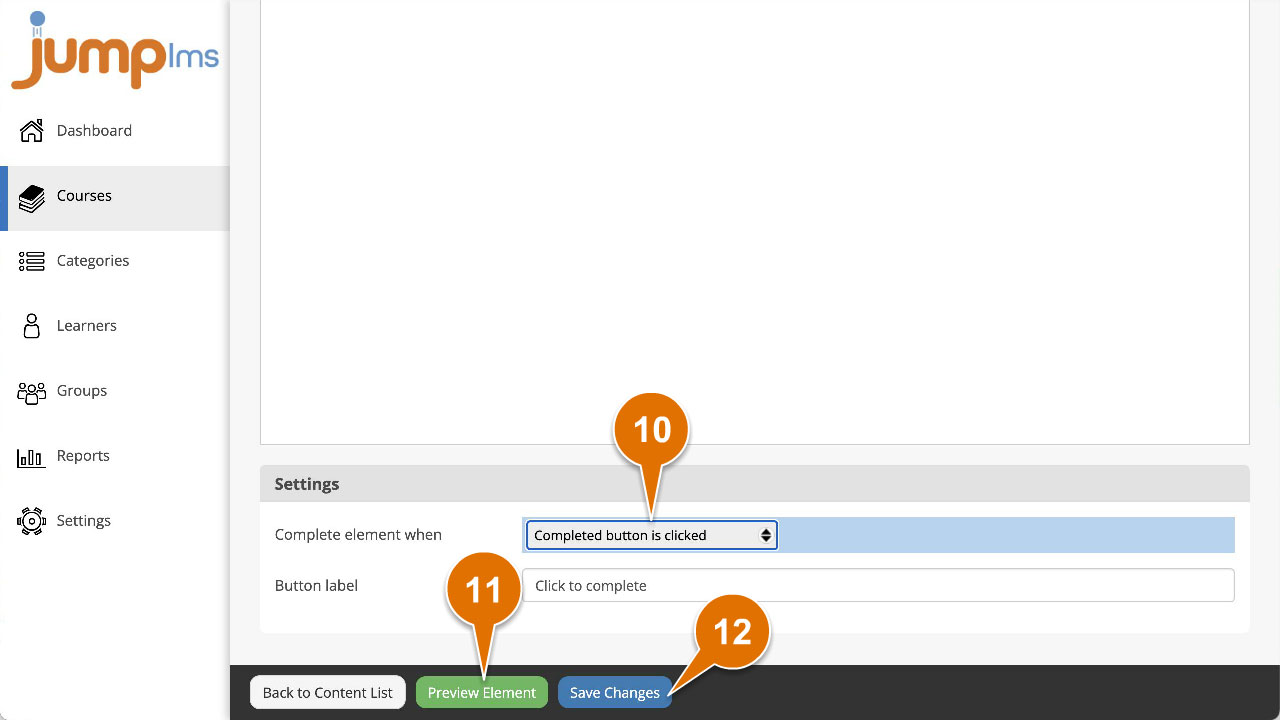
The HTML content element has now been added to your course.
Contact the JumpLMS team and we’ll help you find the right answer.