How to create a document element in JumpLMS
Document elements let you add files such as PDFs, Word documents, Excel spreadsheets, and PowerPoint presentations to your JumpLMS courses.
Learners can view documents inside the course, and you can choose whether they are allowed to download the file.
How to create a document element
-
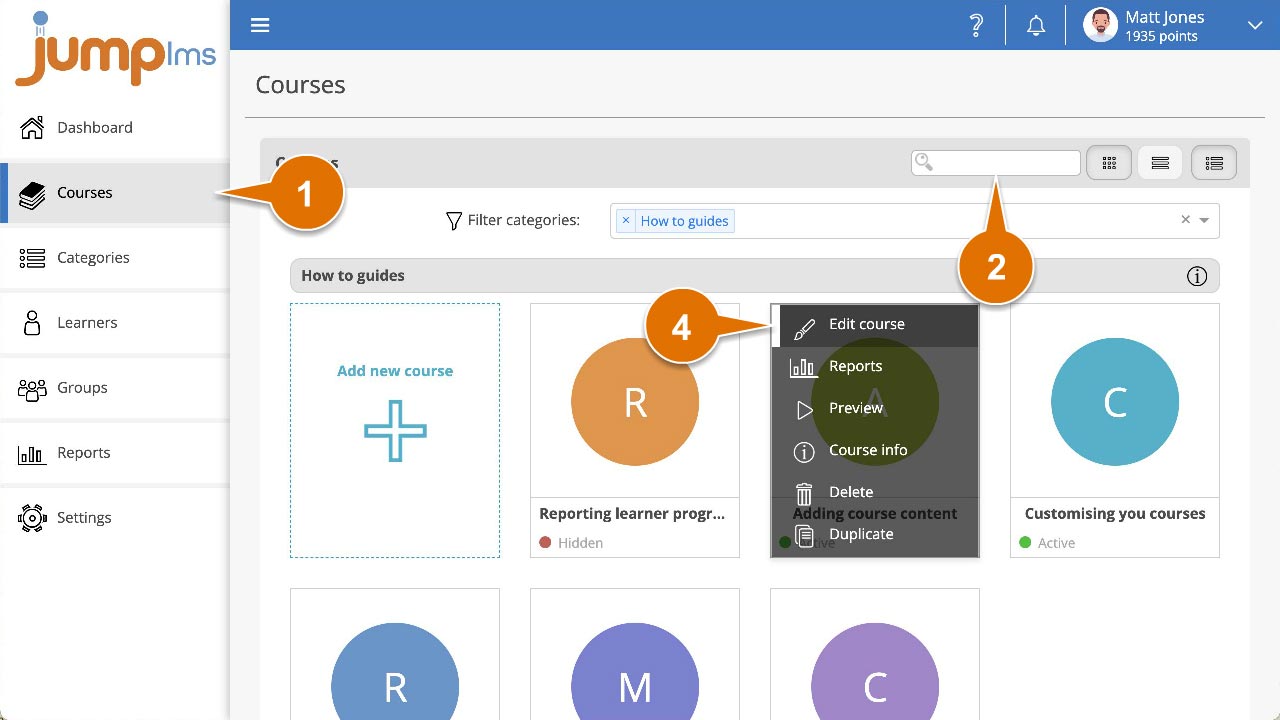
Click on the Courses tab.
-
Search for the course you want to add the document element to, or find it in the course list.
-
Open the course options and click Edit course.
-
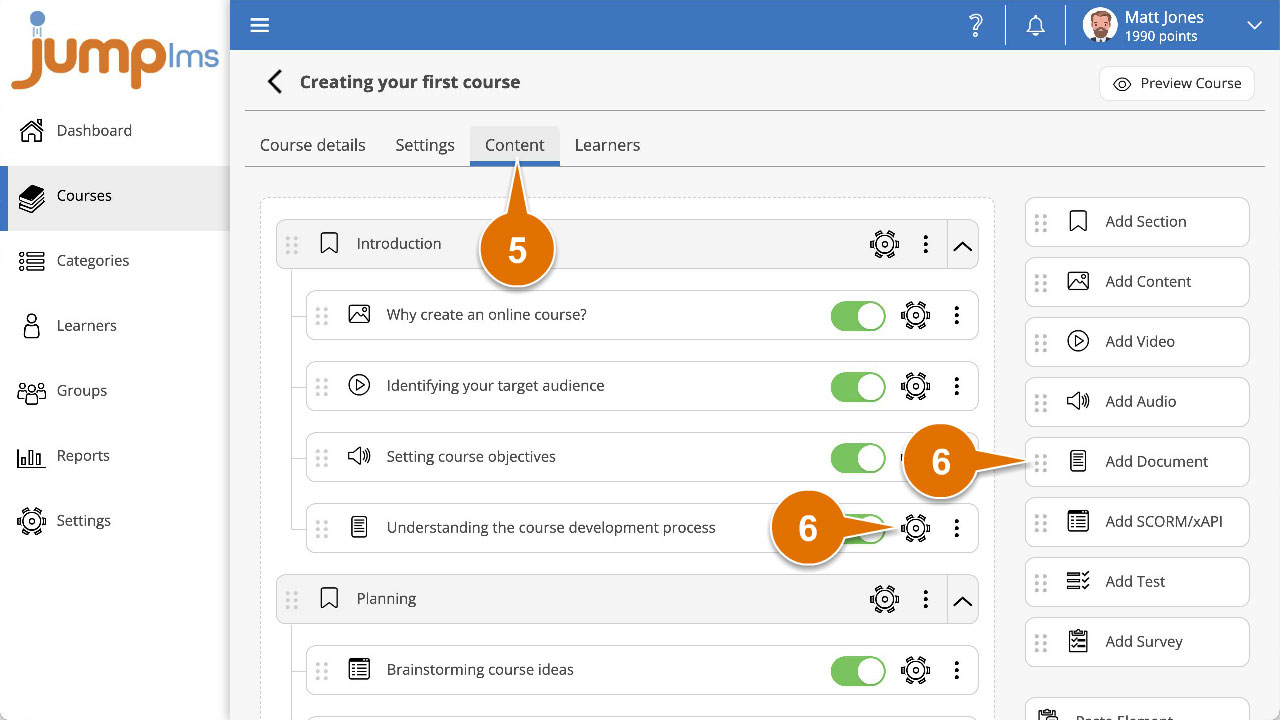
Click on the Content tab.
-
Click Add Document to add the element to the end of the course structure, or drag and drop it into the position you want. Then click Edit.
-
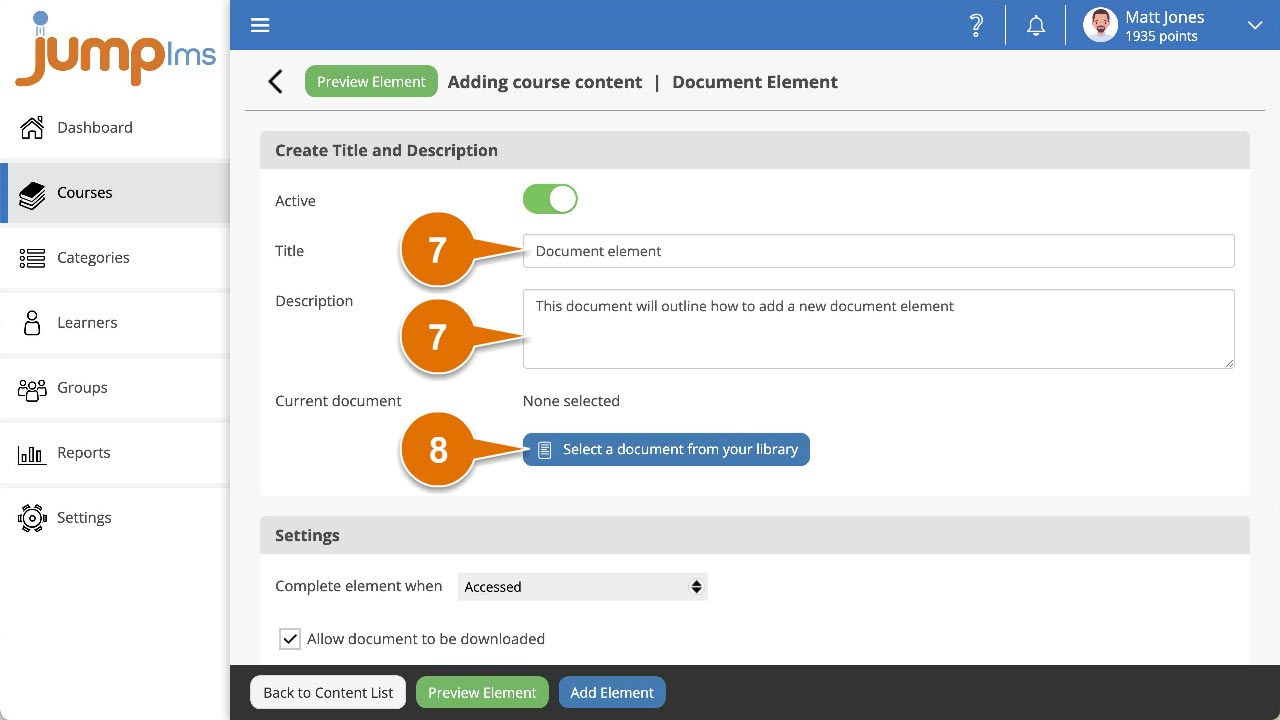
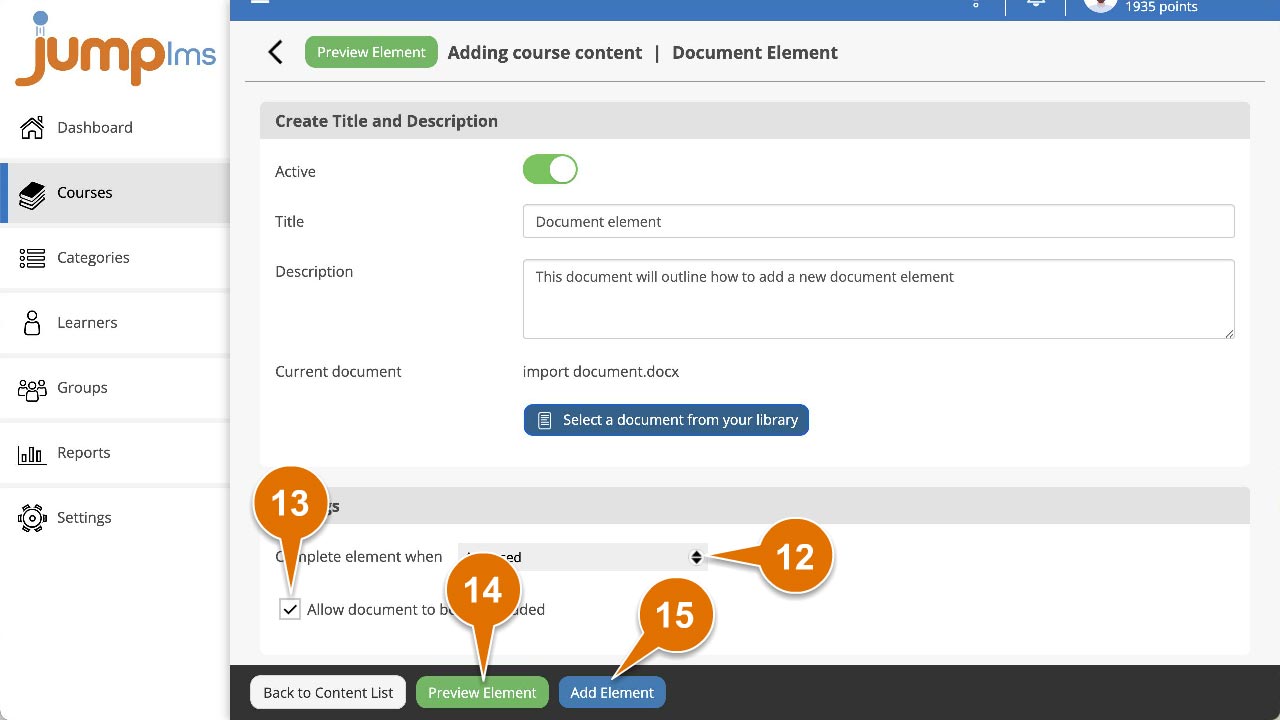
Enter a title and description for the document element.
-
Click Select a document from your library to open the Resource Library.
-
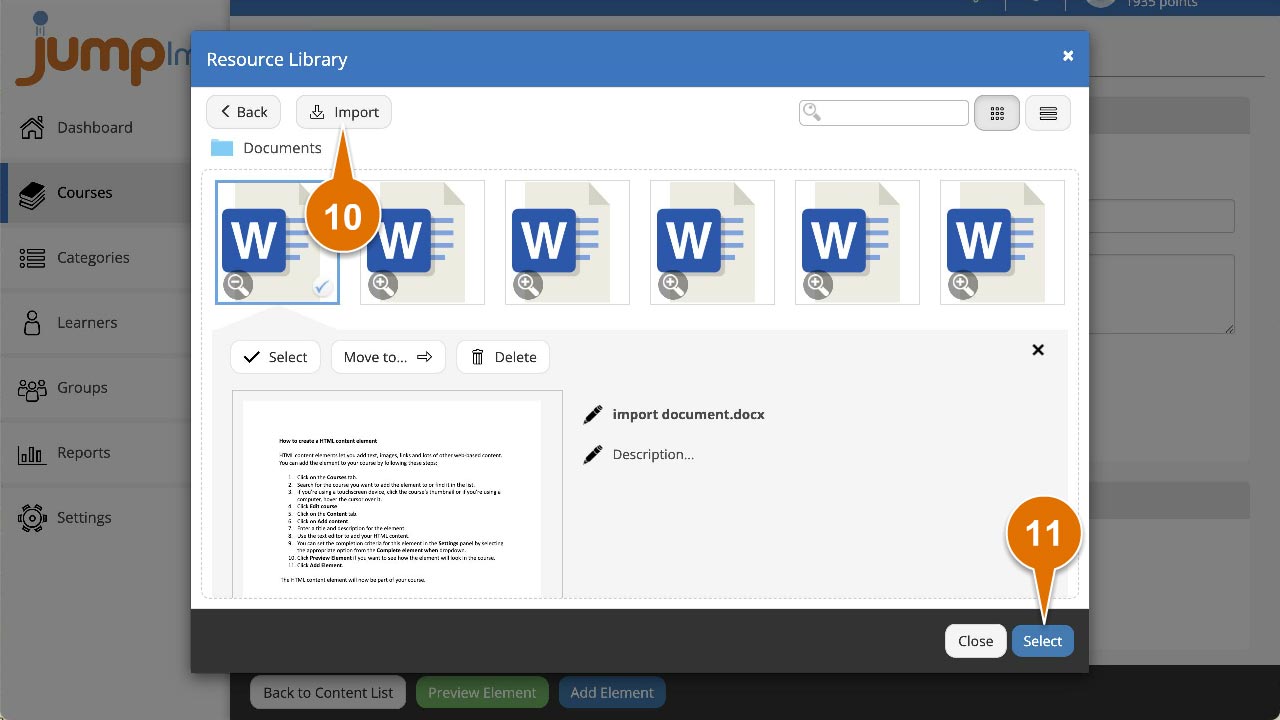
Open the folder where you want to import the document.
-
Click Import and browse to the location of your document, or drag and drop the file directly into the upload area.
-
When the document has finished importing, select it and click Select.
-
Set the completion criteria in the Settings panel by choosing an option from the Complete element when dropdown.
-
To allow Learners to download the file, tick Allow document to be downloaded.
-
Click Preview Element if you want to see how the document element will look in the course.
-
Click Add Element.
The document element has now been added to your course.
Contact the JumpLMS team and we’ll help you find the right answer.