How to customise the course player in JumpLMS
You can customise the course player for individual courses in JumpLMS, helping each course feel distinct while still fitting your portal brand.
This guide explains how to change a course colour scheme and add a course image.
How to customise the course colour scheme
New courses automatically use the same colour scheme as your JumpLMS portal. You can override this for an individual course if needed.
-
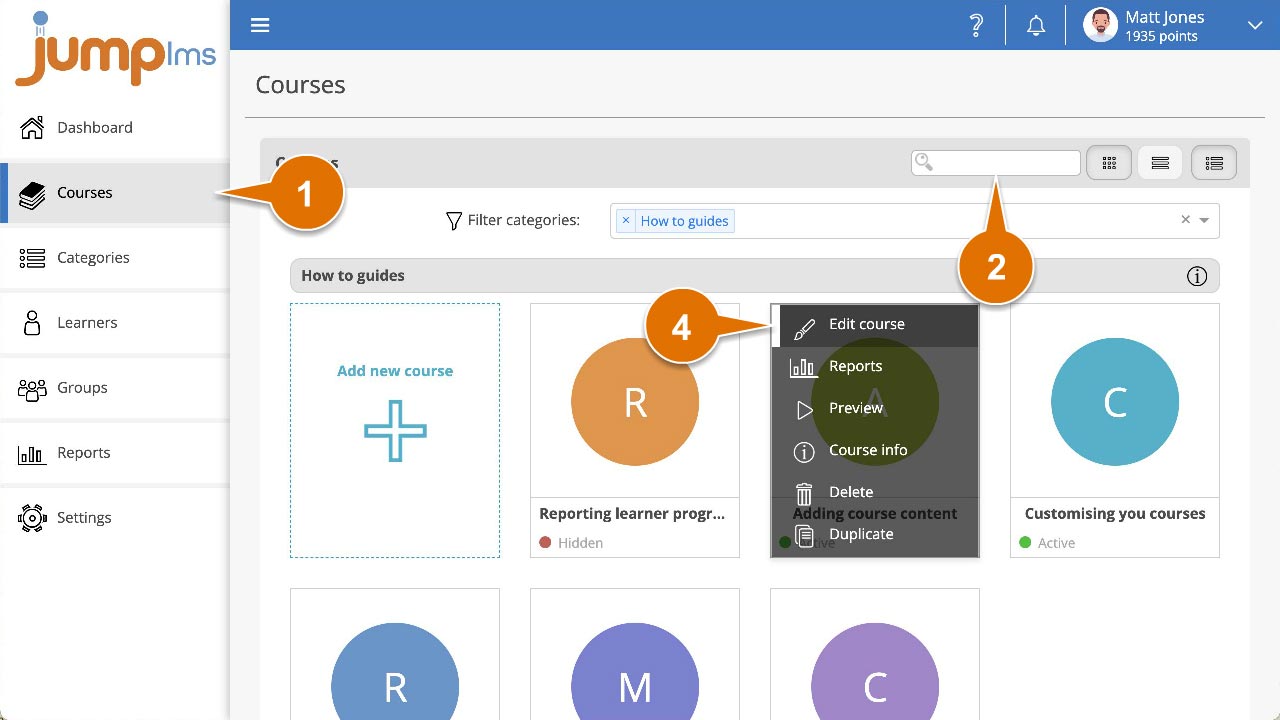
Click on the Courses tab.
-
Search for the course you want to customise, or find it in the course list.
-
Open the course options and click Edit course.
-
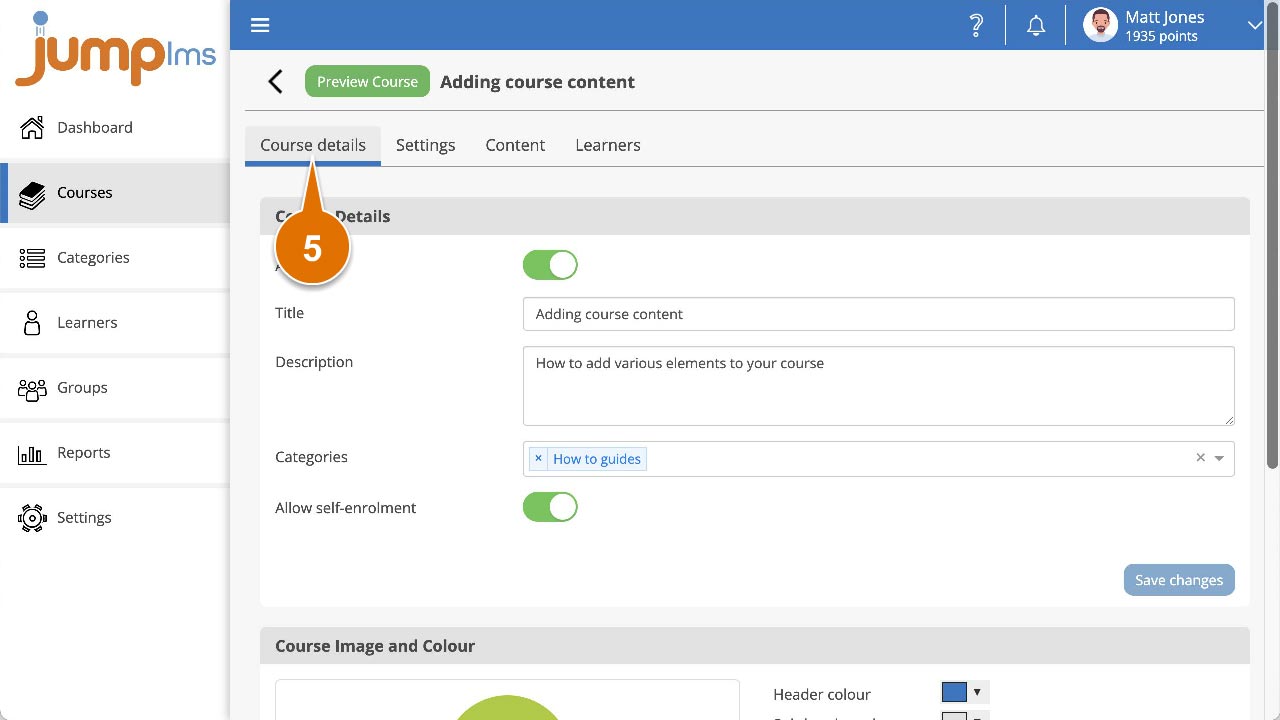
Click on the Course details tab.
-
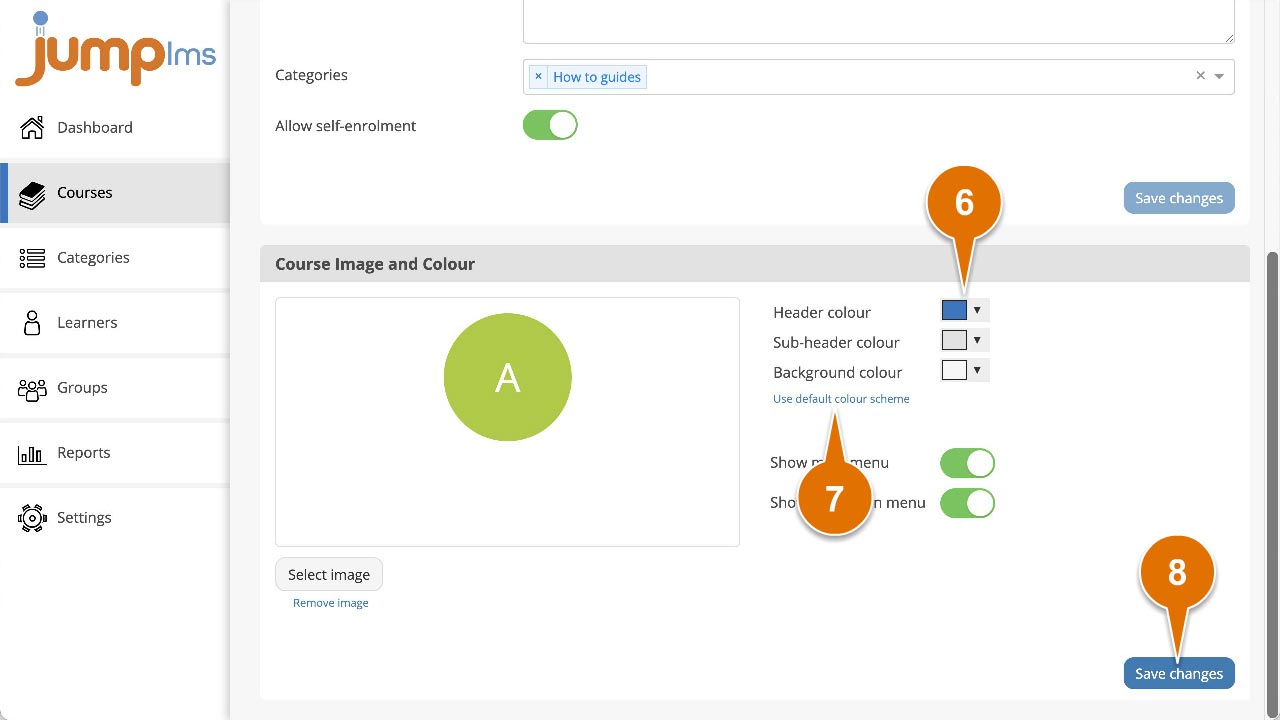
Click the header, sub-header, or background colour swatch and choose the colour you want. You can also enter a hex colour code.
-
To return to your portal colour scheme, click Use default colour scheme.
-
Click Save changes.
The new colour scheme has now been applied to the course. You can view it by clicking Preview course.
How to add a course image
You can add a course image to help identify the course in course listings and on the course main menu screen.
-
Click on the Courses tab.
-
Search for the course you want to customise, or find it in the course list.
-
Open the course options and click Edit course.
-
Click on the Course details tab.
-
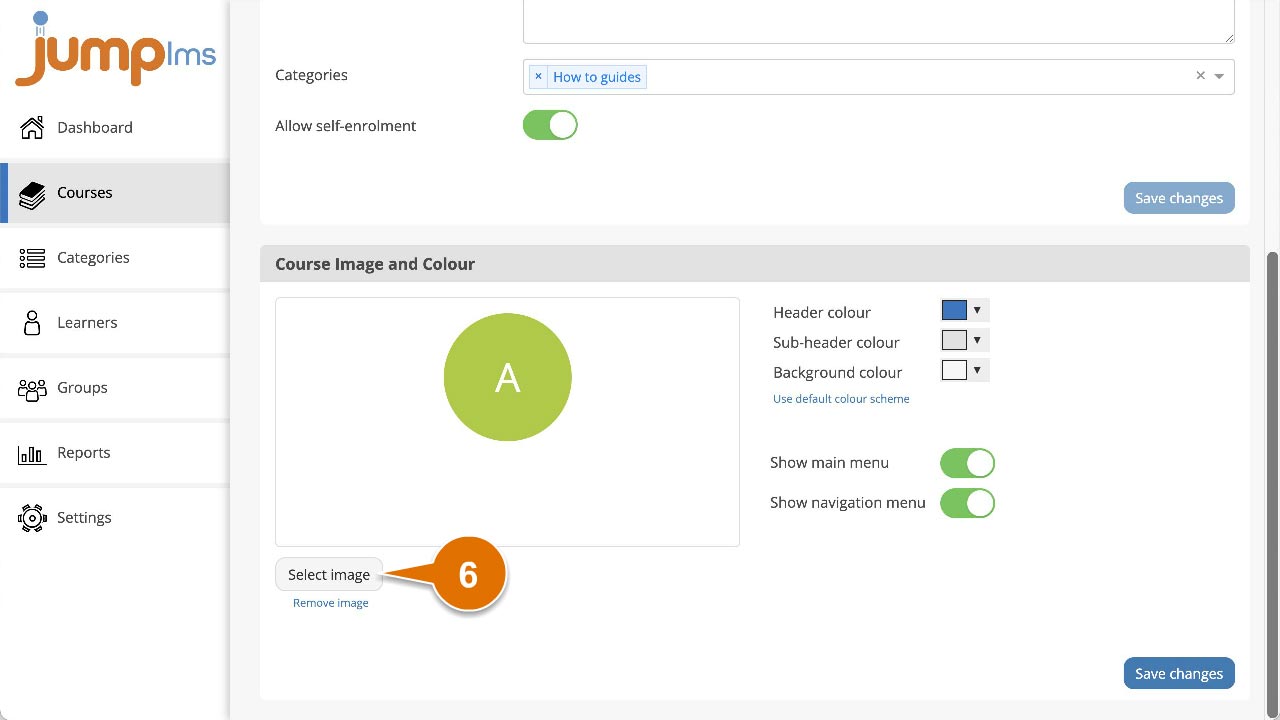
Click Select image to open your Resource Library.
-
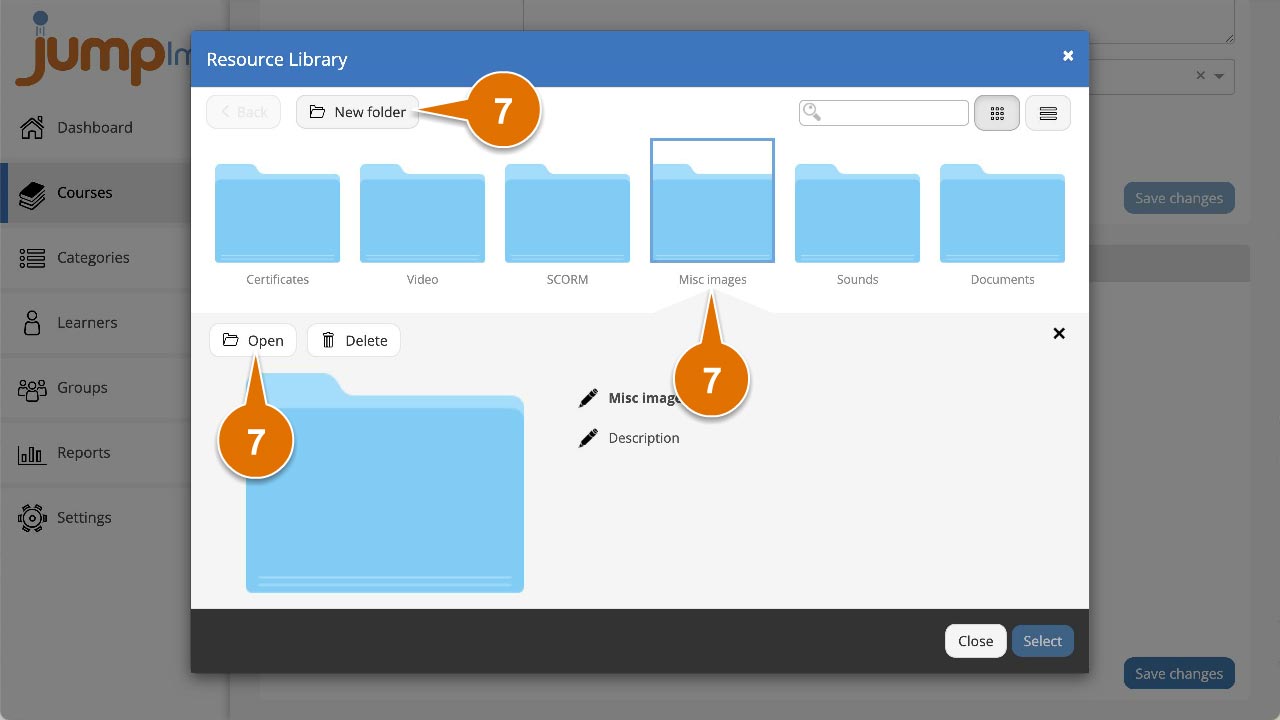
Open the folder where you want to import your course image. You can also create a new folder by clicking New folder.
-
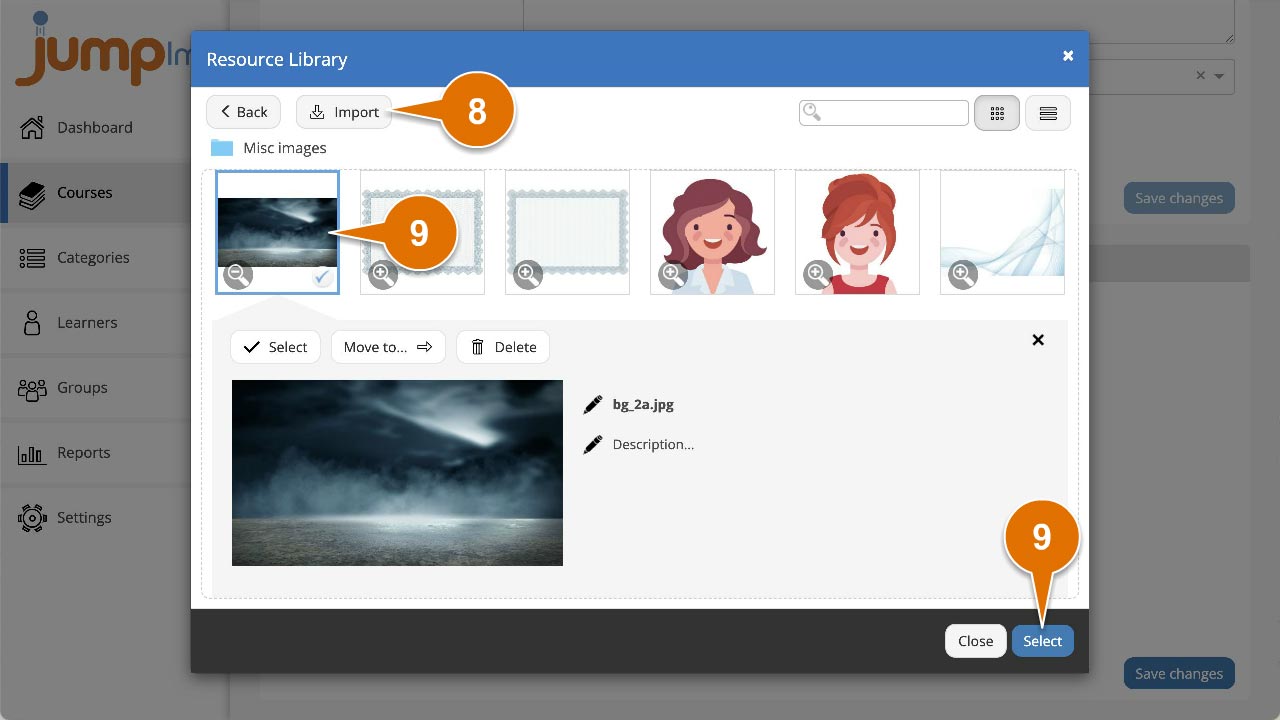
Click Import and browse to your course image, or drag and drop the image directly into the Resource Library.
-
When the image has uploaded, select it and click Select.
-
When the Resource Library closes, click Save changes.
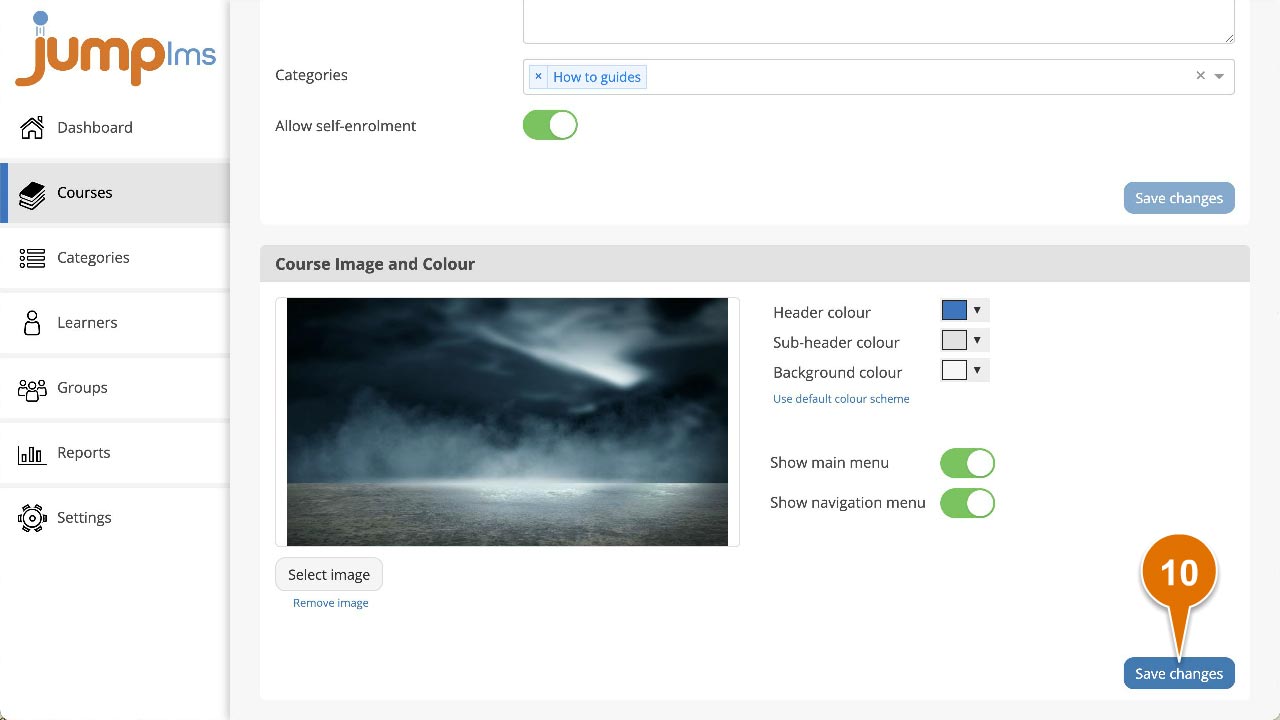
The image has now been applied to your course.
Contact the JumpLMS team and we’ll help you find the right answer.