How to enable public access to your course catalogue and self-registration in JumpLMS
To sell courses publicly through JumpLMS, visitors need to be able to browse your course catalogue and create their own account.
You can enable public catalogue access first, then enable self-registration so new Learners can create an account before buying access to a course.
Enable public access to your course catalogue
-
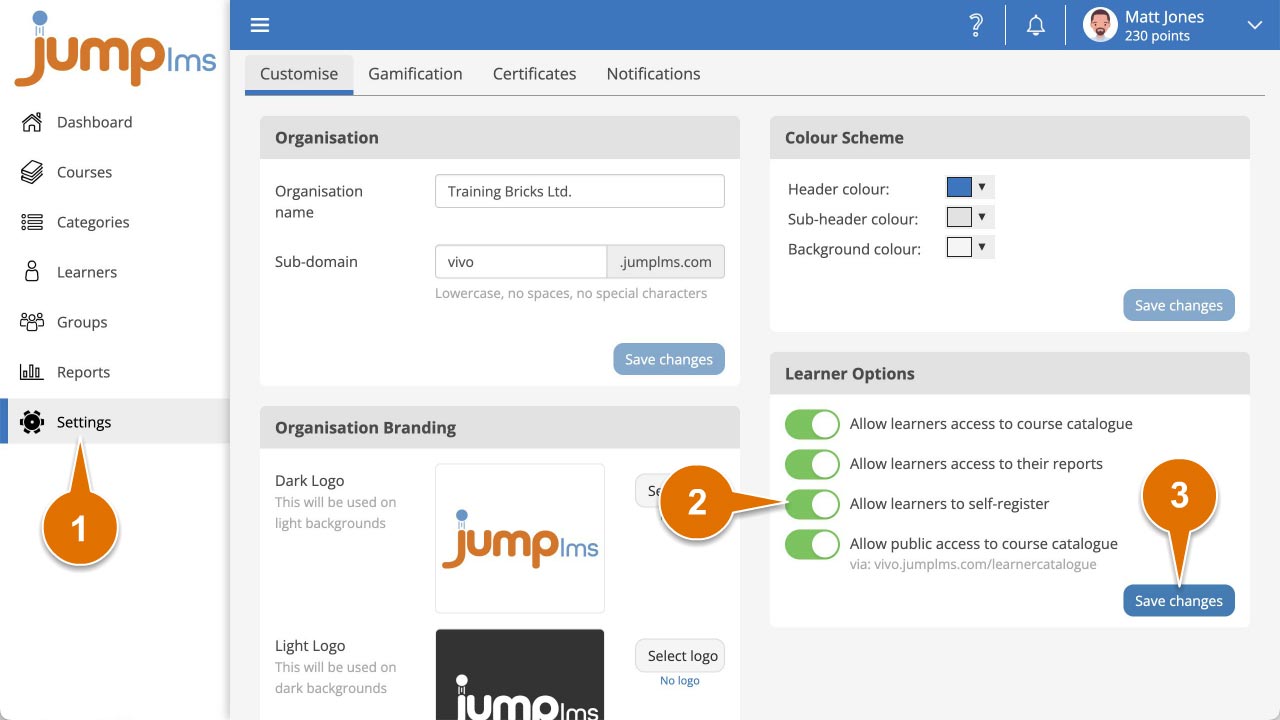
Click on the Settings tab.
-
Click the Customise tab.
-
Enable the Allow public access to course catalogue switch.
-
Click Save changes.

Visitors can now browse your course catalogue without signing in to your portal.
You can link to your course catalogue page using:
Enable Learner self-registration
When someone wants to buy access to a course, they need to sign in by creating their own account. To allow this, enable self-registration.
-
Click on the Settings tab.
-
Click the Customise tab.
-
Enable the Allow Learners to self-register switch.
-
Click Save changes.
Contact the JumpLMS team and we’ll help you find the right answer.